Key Benefits of Hiring a Minneapolis Roofer for Your HomeKey Benefits of Hiring a Minneapolis Roofer for Your Home

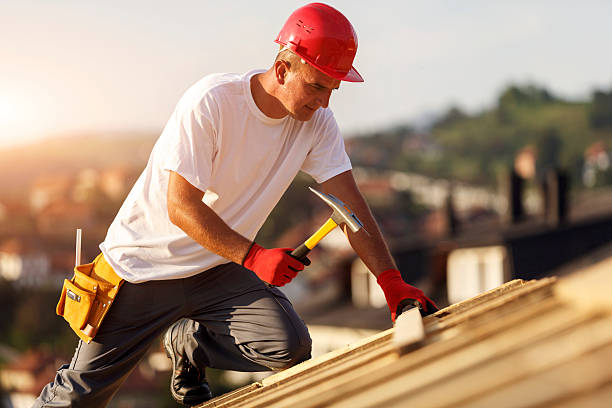
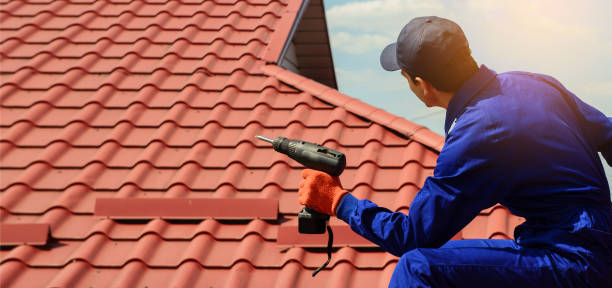
When it comes to maintaining or upgrading your home, few investments are as critical as ensuring the integrity of your roof. While some homeowners may be tempted to take a do-it-yourself (DIY) approach or hire unqualified contractors to save money, working with professional roofers offers distinct advantages that can save you time, money, and stress in the long run. Below, we explore the essential benefits of hiring professional roofers and why their expertise matters.

Professional roofers bring years of training and hands-on experience to every project they handle.

  • Identify even subtle signs of damage or wear that an untrained eye might miss.
  • Recommend appropriate solutions based on your specific roofing needs.
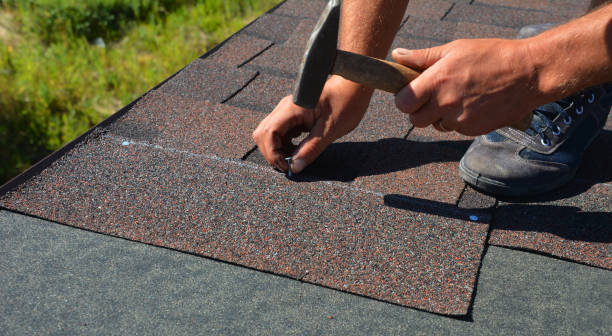
  • Work with various roofing materials such as asphalt shingles, metal panels, clay tiles, or slate.

Because they have likely completed hundreds of similar projects before yours, they can anticipate challenges and resolve them efficiently.

Professional roofers have access to premium-quality roofing materials that may not be available at local hardware stores. These materials often come with manufacturer warranties and are designed to offer long-lasting durability.

  • Proper sourcing of high-grade materials for better performance.
  • Knowledge of which material best suits your region’s climate conditions.
  • Use of specialized tools for correct installation and finishing.

A quality roof made from durable materials not only enhances curb appeal but also boosts your home’s overall value.

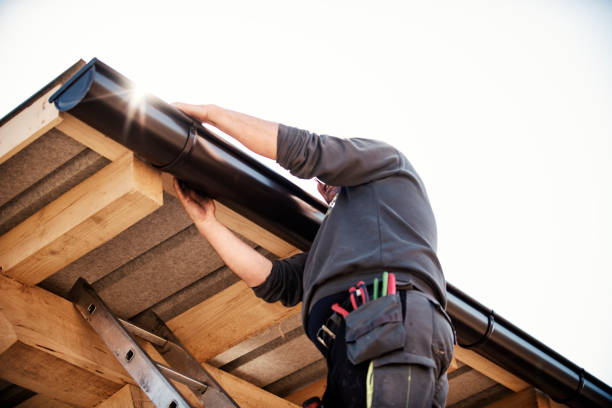
Roof replacement or repair is physically demanding work that involves significant safety risks such as falls, injuries from tools, or exposure to harsh weather conditions.

  • Using appropriate harnesses and fall protection systems.
  • Training their workers on OSHA (Occupational Safety and Health Administration) standards.
  • Carrying liability insurance in case accidents occur on-site.

By hiring experts who prioritize safety protocols, you reduce the risk associated with tackling a dangerous job yourself.

DIY/Unqualified Work Professional Roofers
Potential for errors during repairs Accurate diagnosis & proper execution
Frequent need for patch-ups Long-lasting solutions
No warranty coverage Materials & workmanship warranties

Professionals get the job done right the first time while ensuring durability—saving you from recurring repair bills.

Roofing projects require careful planning and execution, which can be overwhelming for homeowners without prior experience.

  • Conducting thorough inspections promptly.
  • Preparing accurate timelines for project completion.
  • Handling clean-up after installation or repair work is complete.

This efficiency allows you to focus on other priorities while trusting that your home improvement project is in capable hands.

Most reputable roofing companies stand by their work by offering warranties not just on materials but also on workmanship. These warranties provide peace of mind knowing that if issues arise down the line due to poor installation or defective products, they will be addressed without additional costs.

Why Hiring a Minneapolis MN Roofing Contractor Is Worth It

The decision to hire professional roofers isn’t just about convenience—it’s an investment in protecting one of your most valuable assets: your home. Their industry expertise ensures superior results while minimizing risks associated with amateur work or shortcuts. By relying on skilled professionals who prioritize quality craftsmanship and safety standards, such as www.minneapolisroofingexperts.com, homeowners can enjoy a robust roof built to last decades while enhancing property value and energy efficiency alike.

Top Signs That Indicate You Need a Minneapolis MN Roofing Contractor for a Full Roof Replacement

A well-maintained roof is essential for protecting your home and ensuring its longevity. However, there comes a point when repairs are no longer sufficient, and a full roof replacement becomes the best option. Here are the top signs that indicate you should consider replacing your roof instead of continuing to patch it with repairs.

When the damage to your roof is widespread, repairing individual sections may not be enough to restore its structural integrity.Sagging roof deck: This could indicate underlying structural issues or water damage.Multiple leaks: If your roof has more than a couple of leaks in different areas, repeated fixes may not hold up over time.Cracked or warped shingles: Significant shingle deterioration often means the entire roof’s lifespan is nearing its end.

The lifespan of a roof depends on the type of materials used.

Roofing Material Average Lifespan
Asphalt Shingles 20-30 years
Metal Roofing 40-70 years
Clay or Concrete Tiles 50+ years
Wood Shingles/Shakes 25-35 years
Slate Roofing 75+ years

If your roof has exceeded its expected lifespan, investing in a replacement may be more cost-effective than frequent repairs.

An aging or damaged roof can affect your home’s energy efficiency. If you notice an unexplained rise in cooling or heating costs, it could be due to: – Poor insulation caused by gaps in roofing materials. – Inadequate ventilation leading to trapped heat or cold air. A new roof with proper insulation and modern energy-efficient materials can help reduce energy consumption.

If you see excessive granules from asphalt shingles collecting in gutters or on the ground around your home, this is usually a sign that the shingles have reached their end of life. Granules protect shingles from harmful UV rays, and losing them weakens their effectiveness.

When repair bills begin to add up significantly over time, it might make better financial sense to replace the entire roof rather than continue addressing recurring issues.

Pros and Cons: Repairs vs Replacement

Option Pros Cons
Repairs Lower upfront cost May not address underlying issues
Extends life temporarily Costs can accumulate over time
Replacement Long-term solution Higher initial investment
Improves energy efficiency Requires more time and planning

Next Steps if You Notice These Signs

If you identify one or more signs mentioned above, consult with professional roofing contractors for an inspection. They can provide expert advice on whether repair work will suffice or if it’s time for a complete replacement.

By addressing roofing concerns early and making informed decisions about replacements versus repairs, you can prevent potential structural damage and ensure that your home remains safe and secure for years to come.

How to Choose the Best Materials for a Minneapolis MN Roof Replacement

Selecting the right roofing materials is a critical decision that affects the longevity, appearance, and functionality of your roof. With a wide variety of options available, it’s essential to assess factors such as durability, climate compatibility, budget, and aesthetic preferences. Below is a detailed guide to help you choose the best roofing materials for long-lasting durability.

Factors to Consider When Selecting Roofing Materials

  1. Climate Suitability
    Different roofing materials perform better under specific weather conditions.
  2. For hot climates: Materials like clay tiles or metal roofs reflect heat effectively.
  3. For regions with heavy snowfall: Asphalt shingles or slate are ideal due to their ability to withstand weight.
  4. In areas prone to hurricanes or strong winds: Metal roofs and architectural shingles provide exceptional wind resistance.
  5. Expected Lifespan
    Each roofing material has a distinct lifespan: | Material | Average Lifespan | |——————|————————| | Asphalt Shingles | 20–30 years | | Metal Roofing | 40–70 years | | Slate | 50–100 years | | Clay Tiles | 50–100 years |

Opt for materials with longevity if you’re planning long-term homeownership.

  1. Cost-Effectiveness
    Budget is often a key consideration when selecting roofing materials.
  2. Asphalt shingles are cost-effective but may require more frequent replacements.
  3. Metal roofs have higher upfront costs but provide excellent durability and low maintenance.
  4. Aesthetics
    Your roof significantly contributes to your home’s curb appeal.

    • Traditional homes pair well with slate or clay tiles.
    • Contemporary designs often benefit from sleek metal panels.
  5. Energy Efficiency
    Modern roofing materials offer energy-saving benefits by reducing heat absorption and improving insulation:

    • Cool roofing options like reflective shingles or coatings can lower energy consumption.
    • Metal roofs with reflective finishes are particularly effective in reducing cooling costs during summer months.

Popular Roofing Materials and Their Pros & Cons

Material Pros Cons
Asphalt Shingles Affordable, easy installation Shorter lifespan
Metal Durable, recyclable, energy-efficient Higher upfront cost
Slate Extremely durable, fire-resistant Heavy weight; requires reinforced structures
Clay Tiles Long-lasting, excellent insulation Fragile; high installation cost

Questions to Ask When Choosing Roofing Materials

Before making your final decision, consider asking these key questions: – Does this material meet my region’s building codes? – Is it suitable for my roof’s slope/design? – What warranty options come with this material? – Are there sustainable or eco-friendly alternatives available?

By carefully evaluating each aspect outlined here—durability, climate compatibility, cost-effectiveness, aesthetics, and energy efficiency—you can select the best roofing material that meets your needs while ensuring long-term performance and value for your property. A well-informed choice today can lead to decades of reliable protection for your home tomorrow.

Enhancing Energy Efficiency with Minneapolis MN Roof Repair Solutions

Advancements in roofing technologies are revolutionizing how homes and commercial buildings manage energy consumption. Below, we explore some of the most notable roofing technologies that enhance energy efficiency.

Cool Roof Coatings

This is achieved through specialized coatings or reflective materials that can be applied to existing roofs or integrated into new installations.

Key benefits of cool roof coatings:– Reflect up to 80% of sunlight. – Reduce cooling costs by maintaining lower indoor temperatures. – Extend the lifespan of roofing materials by reducing heat-related damage.

Examples of cool roof coating types:| Type of Coating | Characteristics | |———————–|———————————-| | Acrylic Coatings | Highly reflective; cost-effective. | | Silicone Coatings | Durable and resistant to weathering. | | Elastomeric Coatings | Flexible and ideal for various climates.

Solar Roofing Systems

Solar roofing technologies include photovoltaic (PV) panels and solar shingles that generate electricity directly from sunlight. These systems offer dual functionality—protecting your home while producing renewable energy.

Advantages of solar roofs:– Drastically reduce dependency on grid-based electricity. – Provide long-term savings on utility bills. – Qualify for federal tax credits and local incentives in many regions.

Solar shingles, in particular, have gained popularity due to their sleek design, blending seamlessly with traditional roofing while providing all the benefits of solar panels.

Insulated Roofing Panels

Insulated roofing panels improve energy efficiency by minimizing heat transfer between your home and the environment. These panels consist of rigid foam insulation sandwiched between layers of durable materials like metal or composite sheeting.

Benefits include:– Enhanced thermal performance (R-values). – Reduced heating and cooling costs year-round. – Soundproofing properties that create a quieter indoor environment.

Green Roof Systems

Features of green roofs:– Act as natural insulators by reducing temperature fluctuations. – Absorb rainwater to minimize stormwater runoff. – Improve air quality by filtering pollutants.

Types of green roofs:1.Extensive Green Roofs:Lightweight with low-maintenance plants such as mosses or grasses. 2.Intensive Green Roofs:Heavier structures supporting shrubs or small trees; require more upkeep but provide greater insulation benefits.

Smart Roofing Technology

Key examples: 1.Self-Healing Materials:Repair minor cracks automatically using advanced polymers. 2.Roof-Mounted Sensors:

By adopting these modern solutions, property owners can effectively reduce their carbon footprint while enjoying long-term economic benefits associated with energy-efficient designs. As these technologies continue to evolve, they promise even greater opportunities for sustainability in the future construction landscape.

The Importance of Quality Workmanship in Minneapolis MN Roof Installation and Replacement

Quality workmanship is a cornerstone of any successful roof installation or replacement project. A roof serves as the primary shield for a home or commercial property, protecting it from weather elements and ensuring structural integrity. Poor craftsmanship can lead to costly repairs, frequent maintenance, and even safety hazards. Here’s why focusing on quality workmanship is essential when it comes to roofing projects.

Key Reasons Why Quality Workmanship Matters

  1. Longevity of the Roof
    High-quality roofing installations ensure that your roof lasts for decades without significant issues. Poor workmanship, on the other hand, can lead to premature wear and tear, water infiltration, or structural vulnerabilities.

    • Asphalt shingles: 20–30 years
    • Metal roofing: 40–70 years
    • Tile or slate: Over 50 years
  2. Improper installation techniques may cut that lifespan in half.
  3. Prevention of Future Issues
    Effective craftsmanship minimizes potential problems such as leaks, poor ventilation, and uneven underlayment placement. These issues often arise when shortcuts are taken during installation.
  4. Enhanced Energy Efficiency
    Properly installed roofs help maintain indoor comfort by regulating temperatures more efficiently:
  5. Correct insulation placement reduces heat transfer.
  6. Tight sealing prevents drafts. This means lower energy bills for homeowners.
  7. Improved Property Value
    Investing in quality roofing not only protects your property but also increases its market value:
  8. Buyers are often willing to pay more for homes with recently installed professional-grade roofs.
  9. An attractive and sturdy roof enhances curb appeal.

Characteristics of Quality Roofing Workmanship

  • Precision in InstallationContractors should follow manufacturer guidelines closely to avoid compromising warranty terms or performance.
  • Attention to DetailProper alignment of shingles or tiles reflects meticulous work that ensures durability.
  • Use of High-Grade MaterialsSkilled professionals know how to pair their craftsmanship with premium materials for optimal results.
  • Cleanliness and SafetyA well-executed project leaves no debris behind and is completed with safety protocols in place.

Risks of Poor Workmanship

Potential Issue Consequences
Misaligned shingles Water leakage, reduced durability
Inadequate sealing around vents Air leaks, higher energy costs
Weak underlayment installation Structural instability
Use of subpar materials Frequent replacements

These risks could result in significant financial burdens over time.

Tips for Ensuring Quality Craftsmanship

  1. Vet contractors thoroughly by asking about their experience and certifications.
  2. Check customer reviews or ask for references from past projects.
  3. Request a detailed written estimate outlining labor and material costs.
  4. Ensure the contractor provides warranties on both materials and labor.
  5. Verify that they follow local building codes and industry best practices.

By taking these steps, you can safeguard your investment while ensuring peace of mind.

Investing in quality workmanship during roof installation or replacement is not just a financial decision—it’s about securing your property’s long-term safety and functionality. Through careful planning, hiring experienced professionals, and using high-grade materials, you achieve a durable roof that stands the test of time while providing maximum value over its lifespan.


Read MoreRead More

Step-by-Step Guide to Minneapolis MN Roof Replacement and Shingle InstallationStep-by-Step Guide to Minneapolis MN Roof Replacement and Shingle Installation

Construction roofer nailing wood board with hammer Construction roofer nailing wood board with hammer on roof installation work roofer contractor stock pictures, royalty-free photos & images

Proper installation of roof shingles is essential for ensuring the durability and effectiveness of your roof. This step-by-step guide outlines the process in detail, helping you or your contractor achieve a professional-grade installation.

Tools and Materials Needed

  • Roofing nail gun or hammer
  • Roofing knife
  • Chalk line
  • Measuring tape
  • Ladder or scaffolding
  • Pry bar (for removing old shingles)
  • Asphalt shingles or other selected roofing material
  • Underlayment (e.g., felt paper or synthetic membrane)
  • Drip edge
  • Roofing nails
  • Starter strip shingles

Step-by-Step Installation Process

  1. Prepare the Roof Surface Start by ensuring the roof deck is clean and free of debris. Remove old shingles if performing a replacement. Inspect for signs of rot or damage on the decking, and make necessary repairs.
  2. Install Drip Edge Apply drip edge along the eaves to prevent water from seeping under the roofing system. Use roofing nails to secure it every few inches, ensuring it lies flush with the roof edge.
  3. Lay Down Underlayment Roll out your chosen underlayment across the roof deck, starting at the bottom edge and working upward toward the ridge. Overlap each row by at least two inches to ensure proper coverage, securing it with staples or nails.
  4. Install Starter Strip Shingles Place starter strip shingles along the eaves to provide an initial barrier against wind-driven rain. These should overhang slightly beyond the drip edge for optimal performance.
  5. Begin Laying Shingles Start with a full shingle at one corner of your roof and work across horizontally:
  6. Align each shingle with your chalk line for straight rows.
  7. Leave a slight gap between adjacent shingles to accommodate expansion due to temperature changes.
  8. Secure each shingle using four roofing nails placed just below its adhesive strip.
  9. Stagger Shingle Rows For proper overlap, cut a portion off one end of every second row’s first shingle to stagger seams. This step improves water resistance by preventing aligned seams where water might seep through.
  10. Trim Around Roof Features Carefully cut shingles using a roofing knife around chimneys, vents, skylights, and other obstructions using metal flashing as reinforcement in these areas to prevent leaks.
  11. Cap Off With Ridge Shingles Install ridge cap shingles along ridges and hips for added protection against wind while providing an attractive finish to your roof.

Key Tips for Success

  • Always follow manufacturer instructions specific to your chosen material.
  • Work during dry weather conditions to avoid slipping hazards on wet surfaces.
  • Use safety harnesses when working on steep roofs.
Feature Recommended Practice
Nail Placement Use four nails per shingle; six if in high-wind areas
Overlap Measurement Maintain at least two inches of overlap
Ventilation Considerations Ensure proper attic ventilation for longevity

By following these steps carefully, you can ensure a durable and appealing shingle installation that protects your home effectively over time while maintaining aesthetic appeal.

How to Tell When You Need a Full Roof Replacement from a Minneapolis Roofer

A roof is a critical component of any home, providing protection from the elements while enhancing energy efficiency and overall structural integrity. However, every roof has a finite lifespan, and recognizing the signs that indicate the need for a full replacement is essential to avoid costly repairs or potential damage to your home. Below, we break down key indicators that suggest it’s time for a new roof and provide actionable steps for homeowners.

Essential Tips for Minneapolis MN Roof Repair and Replacement Needs

  1. Asphalt shingles: 20-25 years
  2. Wood shakes: 20-30 years
  3. Metal roofs: 40-70 years
  4. Clay tiles: 50+ years
    If your roof is nearing or has exceeded its expected lifespan, it’s time to start planning for a replacement.
  5. Visible Damage to Shingles
    Look for:
  6. Cracked, curled, or missing shingles
  7. Granule loss on asphalt shingles (check gutters and downspouts)
  8. Bald spots or uneven wear patterns
  9. Water Damage or Leaks
    Water stains on ceilings or walls may indicate leaking caused by deteriorated roofing materials. Addressing this issue promptly can prevent extensive structural damage.
  10. Sagging Roof Deck
    A sagging appearance often signals underlying structural issues with the decking or supports, which likely requires an immediate replacement.
  11. Moss and Algae Growth
    While moss and algae are not always harmful initially, over time they can retain moisture that accelerates shingle deterioration.
  12. High Energy Bills
    An old or damaged roof may lead to poor insulation, causing heating and cooling systems to work harder than necessary.

Benefits of Timely Minneapolis MN Roof Installation

  • Improved Safety: A new roof eliminates safety hazards such as leaks and structural instability.
  • Enhanced Energy Efficiency: Modern roofing materials often include energy-efficient options.
  • Increased Home Value: An updated roof can boost curb appeal and resale value.
  • Prevention of Costly Repairs: Investing in replacement proactively helps avoid extensive repair costs caused by neglecting damages.

When Repairs Are No Longer Enough

While minor issues like replacing a few shingles or sealing small leaks may delay larger repairs temporarily, there comes a point when constant fixes become more expensive than replacing the entire roof. Keep track of repair costs annually—if they amount to more than 50% of what you’d spend on new installation, it’s likely more cost-effective to opt for replacement instead.

Budgeting for Your New Roof

Roofing Material Average Lifespan Estimated Cost per Square Foot*
Asphalt Shingles 20–25 years $3–$6
Metal Roofing 40–70 years $5–$14
Clay/Concrete Tiles 50+ years $10–$18
Wood Shakes/Shingles 20–30 years $6–$12

*Costs vary based on location and installation complexity.

Additionally: – Obtain multiple quotes from licensed contractors. – Factor in labor costs and permit fees. – Consider financing options if upfront payment isn’t feasible.

Recognizing when it’s time for a full roof replacement—and acting accordingly—can save you significant stress, expense, and potential damage in the long run. By staying vigilant about warning signs such as aging materials, water damage, and rising energy bills, you’ll be better prepared to make timely decisions about maintaining one of your home’s most important components.

Understanding the Costs Involved in Roof Replacements and How to Budget

When considering a roof replacement, understanding the associated costs is crucial for proper planning and budgeting. Roof replacement is a significant investment that can vary depending on several factors, including materials, labor, roof size, and geographic location. Let’s break down the key cost components and budgeting tips to ensure you’re financially prepared.

Factors Affecting Roof Replacement Costs

  • Roof Size and Pitch: Larger roofs require more materials and labor. Steeper roofs may also involve higher costs due to increased complexity.
  • Material Choice: Different roofing materials come with varying price points per square foot:
  • Asphalt shingles: $3–$5 per square foot
  • Metal roofing: $5–$12 per square foot
  • Clay tiles: $10–$18 per square foot
  • Wood shakes: $6–$10 per square foot
  • Labor Costs: Labor makes up a substantial portion of roof replacement expenses. Complex designs or removing old roofing materials can drive up costs.
  • Location: Regional pricing differences, local contractor fees, and permitting requirements can influence your final bill.
  • Additional Features: Skylights, chimneys, or custom ventilation may necessitate additional structural adjustments or specialized work.

Average Cost Ranges for Roof Replacement

Home Size (Square Feet) Estimated Range (Asphalt) Estimated Range (Metal)
1,000 sq. ft. $3,000–$5,000 $5,000–$12,000
1,500 sq. ft. $4,500–$7,500 $7,500–$18,000
2,500 sq. ft. $7,500–$12,500 $12,500–$30,000

Tips for Budgeting Your Roof Replacement

Effective budgeting involves anticipating both expected and unforeseen expenses while exploring ways to reduce costs where possible.

  1. Get Multiple Quotes
    Reach out to at least three reputable contractors for estimates. Compare pricing details such as material breakdowns and labor charges.
  2. Inspect Your Roofing Structure First
    Have a professional assess your roof’s condition before repairs begin. Identifying issues like rotting wood or damaged underlayment early can prevent surprise costs.
  3. Plan for Contingencies
    Set aside an extra 10%–15% of your budget in case unexpected repairs arise during construction.
  4. Consider Financing Options
    If upfront costs are challenging to manage:
  5. Look into payment plans offered by contractors.
  6. Explore home improvement loans or refinancing options.
  7. Choose Cost-Effective Materials Wisely
    While high-end materials last longer and add value to your home over time:
  8. Asphalt shingles offer durability at an affordable price point.
  9. Metal roofs provide longevity but may require higher initial investment.
  10. Leverage Insurance Coverage Where Possible
    If damage is due to storms or other covered events:
  11. Contact your insurance provider.
  12. File claims promptly with detailed documentation of damages.

Long-Term Savings Considerations

While upfront costs are important to manage effectively during budgeting discussions, it’s equally vital to evaluate long-term benefits such as energy efficiency and durability when selecting materials or contractors for your roof replacement project.

By carefully examining every cost factor involved in replacing a roof while implementing smart financial strategies ahead of time—homeowners will find themselves better equipped both now financially long term

Filing an Insurance Claim for Roof Damage with a Minneapolis MN Roofing Contractor

Filing an insurance claim for roof damage can seem like a daunting task, especially if you’re unfamiliar with the process. However, understanding the necessary steps and being prepared can make the experience smoother and increase your chances of receiving the compensation you deserve. Here’s a detailed guide to help you navigate this process effectively.

Steps to Filing an Insurance Claim for Roof Damage

  1. Conduct a preliminary inspection to identify visible roof damage.
  2. Look for missing shingles, leaks, cracks, or other signs of wear and tear.
  3. Document all damages by taking clear photos and videos from multiple angles.
  4. Familiarize yourself with your homeowner’s insurance policy.
  5. Understand what types of roof damage are covered (e.g., storm damage, hail, wind) and any exclusions.
  6. Check whether your policy includes replacement cost coverage or actual cash value (ACV).
  7. Notify your insurance company about the potential claim as soon as possible.
  8. Provide them with basic details about the damage (e.g., date of occurrence and weather event if applicable).
  9. Confirm deadlines for filing claims set by your insurer.
  10. Schedule an inspection with a licensed roofing contractor for a more detailed evaluation.
  11. Request a written estimate detailing required repairs or replacement costs.
  12. Some contractors may even assist in communicating directly with your insurance adjuster.
  13. Submit all required documentation to initiate the claims process, including:
    • Photos/videos of damage
    • Written estimate from your contractor
    • Relevant receipts or invoices
    • Any additional evidence like weather reports if applicable
  14. Keep copies of all submitted materials for your records.
  15. The insurance company will assign an adjuster to inspect the roof damage in person.
  16. Be present during this visit along with your contractor (if possible) to ensure accurate assessment and documentation.
  17. After reviewing your claim, the insurer will provide a settlement offer based on their findings and policy terms.
  18. If there are discrepancies in their offer compared to repair estimates, you may need to negotiate or submit additional evidence.
  19. Once approved, hire a professional roofer to complete the necessary repairs or replacement work outlined in the claim.

Contractor hands installing bitumen roof shingles using hammer in nails. Contractor hands installing bitumen roof shingles using hammer in nails. roofer contractor stock pictures, royalty-free photos & images

Common Mistakes to Avoid During Roof Damage Claims

  • Failing to document evidence thoroughly before starting repairs.
  • Missing deadlines set by your insurer for filing claims or submitting information.
  • Accepting settlement offers without carefully reviewing them against repair estimates.

Table: Key Differences Between Replacement Cost Coverage & Actual Cash Value

Factor Replacement Cost Coverage Actual Cash Value (ACV)
Payout Amount Covers full cost of repairing/replacing without depreciation deductions Deducts depreciation based on age/wear
Upfront Costs May cover upfront costs entirely Requires homeowners to bear some upfront costs
Best For Newer roofs Older roofs

What You Need To Expect After Filing

Once you’ve filed a claim: – Timelines can vary depending on factors like insurer processes or weather-related disasters affecting many homes simultaneously. – You may need patience as adjusters evaluate multiple claims during busy periods following storms or natural disasters. – Expect clear communication from insurers regarding next steps; don’t hesitate asking questions if anything seems unclear at any stage.

By following these guidelines thoroughly while remaining organized throughout interactions between insurers + contractors ensures smooth experience protecting long-term investment rooftop provides home

Comparing Different Roofing Materials: Asphalt, Clay, Metal, and Wood Options

Selecting the right roofing material is a critical decision for homeowners and contractors alike. The material you choose not only impacts the aesthetic appeal of the property but also its durability, energy efficiency, and maintenance requirements. Below, we’ll explore four popular roofing materials — asphalt, clay, metal, and wood — to help you make an informed choice.

Asphalt Shingles

Overview:
Asphalt shingles are one of the most commonly used roofing materials in residential construction due to their affordability and ease of installation.

Advantages:
– Cost-effective option suitable for most budgets.
– Available in a wide range of colors and styles.
– Relatively easy to install compared to other materials.
– Offers decent durability with lifespans typically ranging from 20-30 years.

Disadvantages:
– Susceptible to damage in extreme weather conditions (e.g., hail or high winds).
– Less environmentally friendly as it is petroleum-based.

Best Suited For: Homeowners seeking an affordable yet reliable roofing material for traditional-style homes.

Clay Tiles

Overview:
Clay tiles are favored for their timeless appearance and excellent durability. They’ve been used for centuries and remain a popular option in regions with warmer climates.

Advantages:
– Extremely long-lasting with lifespans exceeding 50 years when properly maintained.
– Provides excellent resistance to fire, rot, and insects.
– Offers natural ventilation by allowing air circulation beneath the tiles.

Disadvantages:
– Heavier than other options; may require reinforced roof structures.
– More expensive upfront compared to asphalt shingles.

Best Suited For: Homes with Mediterranean or Spanish architectural designs or properties in areas experiencing hot weather.

Metal Roofing

Overview:
Metal roofs have gained popularity as an energy-efficient and durable roofing solution with a modern appeal.

Advantages:
– Extremely durable; can last 40–70 years depending on the type of metal used (e.g., steel, aluminum).
– Reflects sunlight effectively, reducing cooling costs during summer months.
– Lightweight yet strong enough to withstand harsh weather conditions like snow or high winds.

Disadvantages:
– Higher initial costs compared to asphalt shingles.
– Can be noisy during heavy rain unless accompanied by proper insulation systems.

Best Suited For: Modern-style homes or properties in regions prone to frequent storms or heavy snowfall.

Wood Shingles/Shakes

Overview:
Wood shingles or shakes deliver a rustic charm that suits both traditional and contemporary architectural styles.

Advantages:
– Eco-friendly when sourced sustainably since wood is biodegradable.
– Provides natural insulation which helps regulate indoor temperatures.
– Unique appearance that weathers beautifully over time (turning silvery-gray).

Disadvantages:
– Requires more maintenance due to vulnerability against moisture, mold, and pests if untreated.
– Shorter lifespan (20–30 years) relative to clay or metal roofs unless treated regularly with preservatives.

Best Suited For: Homes with rustic aesthetics or those located in drier climates where wooden material works best without excessive moisture exposure.

Comparison Table

Material Lifespan Cost Maintenance Weather Resilience Ideal Style Environmental Impact
Asphalt 20–30 years Low Low Moderate Traditional Moderate
Clay 50+ years High Low Excellent (fire-resistant) Mediterranean/Spanish High
Metal 40–70 years High Low Excellent Modern High (recyclable)
Wood 20–30 years Moderate/High? Medium/High ? Adequate Styles Rustic Traditional? Lower

Expert Minneapolis MN Roofing Contractor Offering Innovative Solutions

The roofing industry has witnessed significant advancements in recent years, driven by technology, sustainability, and efficiency. Contractors and homeowners alike are benefiting from innovative solutions that not only improve functionality but also contribute to environmental conservation. Below are some of the most impactful trends and innovations reshaping the roofing industry today.

1. Solar Roofing Systems

Solar roofs are no longer just bulky panels installed over traditional roofing materials. Modern solar shingles seamlessly integrate into roof designs, providing both energy production and aesthetic appeal. Key benefits include:
Energy Efficiency: Generate renewable energy to reduce utility bills.
Aesthetic Design: Blend into the roof for a sleek appearance.
Durability: Often comparable in lifespan to traditional shingles.

Companies like Tesla have developed solar roof tiles that mimic the look of standard asphalt or slate shingles while offering all the advantages of solar power.

Feature Traditional Solar Panels Solar Shingles
Aesthetics Bulky Sleek and discreet
Energy Production High Moderate
Installation Cost Lower Higher

2. Cool Roof Technology

Cool roofs are designed to reflect more sunlight and absorb less heat, making buildings more energy-efficient, particularly in hot climates. These roofs use specialized coatings or reflective materials like white membranes to achieve their effect.

Benefits of Cool Roofs:

  • Reduced energy consumption for cooling systems.
  • Prolonged roof lifespan due to reduced thermal stress.
  • Enhanced indoor comfort during peak summer months.

Cool roof coatings can be applied to various materials like asphalt shingles, metal sheets, or tiles for maximum flexibility.

3. Green Roofing Systems

Green (or living) roofs incorporate vegetation layers over waterproof membranes, bringing nature directly onto rooftops in urban areas.

Advantages of Green Roofs:

  • Improved insulation properties.
  • Mitigation of urban heat island effects.
  • Enhanced air quality through carbon absorption.
  • Stormwater runoff management by absorbing precipitation.

Urban environments are increasingly adopting green roofs on commercial properties for their eco-friendly benefits and ability to meet local sustainability regulations.

4. Advanced Synthetic Materials

  • Resistant to impact, fire, and extreme temperatures.
  • Lightweight for easier installation.
  • Lower maintenance requirements compared to natural alternatives.

Homeowners looking for longevity often opt for synthetic roofing as it offers a balance between cost-effectiveness and performance.

5. Smart Roofing Technology

Smart roofing integrates IoT (Internet of Things) sensors with traditional systems to monitor a roof’s condition in real time. Sensors can detect leaks, measure moisture levels, or track temperature changes within the structure.

Features of Smart Roofs:

  • Early detection of problems reduces repair costs.
  • Data accessibility via mobile apps or cloud platforms.
  • Integration with other smart home systems for seamless operation.

This technology is particularly beneficial for commercial properties where maintenance schedules require detailed monitoring due to expansive surface areas.

6. Recycled Roofing Materials

Sustainable practices are gaining traction across industries, including roofing. Materials such as recycled rubber tires or post-consumer plastics are being repurposed into durable shingles or panels that rival traditional products in strength and appearance while diverting waste from landfills.

Why Choose Recycled Materials?

  1. Environmentally friendly choice aligned with green building standards.
  2. Comparable durability at a competitive price point.
  3. Availability in various textures and colors suitable for different architectural styles.

The integration of these innovative solutions reflects a broader shift toward sustainability and technological advancement within the roofing sector. By staying informed about these trends, homeowners can make smarter decisions about their investments while contributing positively to environmental goals.

Installing new roof Installing new roof with air gun roofer contractor stock pictures, royalty-free photos & images

Essential Safety Measures Every Roofer Should Follow Before Starting a Project

Roofing is an inherently risky job that requires careful planning and adherence to safety protocols. Whether you are a professional roofer or taking on a DIY project, ensuring your safety and the safety of others is paramount. This guide outlines essential safety measures that every roofer should follow before beginning any roofing task.

Conduct a Thorough Risk Assessment

  • Uneven surfaces
  • Weak or damaged roof structures
  • Weather conditions (rain, wind, or extreme heat)
  • Nearby electrical wires

By understanding these risks, you can implement preventative measures to mitigate accidents.

Wear Appropriate Personal Protective Equipment (PPE)

  • Hard hats: Protects against head injuries from falling objects.
  • Non-slip boots: Offers stability, especially on steep or slippery surfaces.
  • Safety glasses/goggles: Shields eyes from debris.
  • Gloves: Prevents cuts and abrasions while handling tools and materials.
  • Harnesses and lanyards: Secures workers when working at heights.

Properly inspect all PPE for wear and tear before use to ensure maximum protection.

Use Stable Ladders and Scaffolding

  1. Always place ladders on a stable, level surface.
  2. Ensure the ladder extends at least three feet above the roof’s edge.
  3. Use ladders rated for your weight combined with tools.
  4. Secure the ladder at the top to prevent movement.

If scaffolding is used, check for proper assembly, load capacity compliance, and guardrails where required.

Verify Structural Integrity of the Roof

Signs of Weakness What to Look For
Sagging areas Uneven or drooping sections
Water damage Rotting wood or wet spots
Cracked shingles or tiles Potential indicators of decay

If any structural issues are identified, address them before proceeding with other tasks.

Maintain Weather Awareness

Weather plays a significant role in roofing safety. Avoid working during adverse conditions like heavy rain, high winds, snow, or extreme heat. Even light moisture can make roofs dangerously slick. Check forecasts regularly and schedule work during favorable weather to reduce risks.

Keep Tools Organized and Secure

  • Use tool belts or tool organizers to keep essentials within reach.
  • Avoid leaving tools unattended near roof edges.
  • Secure larger equipment to prevent accidental falls.

Additionally, inspect power tools for defects before use to avoid malfunctions during operation.

Establish Clear Communication Protocols

  • Use hand signals if verbal communication is difficult due to distance or noise levels.
  • Confirm everyone understands emergency plans in case of an accident.

Two-way radios can also be useful when working on larger job sites where visual contact isn’t possible.

Following these critical safety measures ensures that every roofing project starts — and ends — with minimal risk while maintaining high standards of professional practice. By prioritizing preparation and precautionary steps upfront, roofers can mitigate hazards effectively while focusing on quality workmanship.


Read MoreRead More

10 Steps to Successfully Hire a Minneapolis MN Roofing Contractor10 Steps to Successfully Hire a Minneapolis MN Roofing Contractor

General Contractor Installing New Roof A roofer and crew work on putting in new roofing shingles.  Small local business serving local families in Washington State. roofer contractor stock pictures, royalty-free photos & images

Installing a new roof is a significant investment, and ensuring it is done correctly can greatly affect its durability, functionality, and overall lifespan. Whether you’re a homeowner taking on the project or hiring professionals, understanding the key steps involved in roof installation is essential.

Step 1: Assess Your Roofing Needs

Before starting the process, evaluate the condition of your existing roof. Key questions to ask include:
– Is the current roof leaking?
– Are shingles cracked, curling, or missing?
– How old is your current roofing material?

This assessment will help determine if a full replacement is necessary or if repairs will suffice.

Step 2: Choose the Right Roofing Material

Material Type Durability Cost Range Ideal Climate Conditions
Asphalt Shingles 15–30 years Low Most climates
Metal Roofing 40–70 years Medium Rainy or snowy regions
Clay Tiles 50+ years High Hot and dry environments
Wood Shingles/Shakes 20–40 years Medium to High Mild to moderate climates

Step 3: Obtain Necessary Permits

Contact your local building authority to determine if you need permits for your roofing project. Failure to comply with local regulations can result in fines or complications during resale.

Step 4: Remove Old Roofing Materials

Safely remove old shingles or tiles to inspect the underlying roof deck. This step helps identify hidden issues such as rot, mold, or structural damage that need repair before proceeding.

Step 5: Conduct Repairs to Roof Decking

Examine the decking for weakened areas and replace any damaged sections with new plywood. A solid foundation ensures long-lasting performance for your new roof.

Step 6: Install Underlayment and Ice/Water Shield

Lay down an underlayment (such as felt paper) across the entire deck surface. For areas prone to ice dams or heavy rainfall, install an additional ice and water shield along valleys and eaves for extra protection against moisture damage.

Step 7: Install Starter Shingles Along the Eaves

Starter shingles create a secure base for subsequent layers of shingles. They reduce water infiltration by sealing gaps at edges where shingles meet.

Key benefits of using starter shingles include: – Improved waterproofing at vulnerable areas. – Protection against wind uplift.

Step 8: Lay Shingles in Proper Alignment

Install rows of shingles beginning from the bottom edge toward the peak while maintaining proper alignment. Overlapping each layer protects against leaks by allowing water to run off easily into gutters.

Pro Tip: Use chalk lines as guides for consistent spacing between rows during installation.

Step 9: Add Flashing Around Penetrations

Install metal flashing around chimneys, vents, skylights, and other penetrations in your roof system. Flashing prevents water from seeping through these critical areas by creating a tight seal with surrounding materials.

Step 10: Finalize with Ridge Caps & Inspections

Place ridge caps along peaks after all field shingles are installed. Ridge caps not only enhance durability but also provide ventilation when paired with ridge vents. Finally, inspect every aspect of your work—or hire an experienced roofer—to ensure proper sealing and flashing installation before completing cleanup.

By following these steps with precision and care, you can ensure that your new roof provides optimal protection and aesthetic appeal for many years ahead.

Finding a Reliable Minneapolis Roofer to Protect Your Home with a Durable Roof

A roof is more than just a structural component of a home—it serves as the first line of defense against the elements. Investing in a durable roof is essential to ensure your home remains safe, energy-efficient, and protected from potential damage. Below, we’ll explore why prioritizing a durable roof matters and how it contributes to overall household safety and comfort.

Top Benefits of Choosing Minneapolis MN Roof Replacement

  • Weather Resistance: A durable roof can withstand harsh weather conditions, including heavy rain, snow, strong winds, and hail.
  • Energy Efficiency: Modern roofing materials often include energy-efficient features that help maintain indoor temperature and reduce heating or cooling costs.
  • Longevity: Quality materials combined with professional installation ensure that your roof lasts longer, minimizing the need for frequent repairs or replacements.
  • Curb Appeal: A sturdy and aesthetically pleasing roof enhances the overall look of your property.
  • Increased Home Value: A well-maintained roof adds to your home’s resale value by assuring potential buyers that it’s in excellent condition.

Avoid Costly Damage with Minneapolis MN Roof Repair

Issue Potential Impact
Leaks Water intrusion can cause damage to walls, ceilings, and insulation.
Mold Growth Persistent moisture can lead to mold formation, posing health risks.
Structural Damage Prolonged exposure to water or heavy snow may weaken structural integrity.
Premature Repairs Low-quality materials often result in frequent repair needs.

Key Factors for a Durable Minneapolis MN Roof Installation

  1. Material Selection
    Choose from robust materials such as asphalt shingles, metal roofing, slate tiles, or clay tiles based on your climate and budget.
  2. Professional Installation
    Hiring experienced roofing contractors ensures proper installation techniques are followed.
  3. Ventilation Systems
    Adequate attic ventilation prevents moisture buildup that could compromise the structure.
  4. Regular Maintenance
    Routine inspections help identify issues early before they escalate into costly problems.
  5. Proper Drainage Systems
    Installing gutters and downspouts ensures water is directed away from the foundation.

Tips for Maintaining Your Roof’s Durability

  • Inspect your roof annually or after major storms.
  • Clear debris like leaves and branches that may accumulate on the surface.
  • Check flashing around chimneys or vents for signs of wear or damage.
  • Trim overhanging tree branches to avoid unnecessary strain on your roofing system.
  • Ensure gutters are free from clogs to facilitate proper drainage.

By understanding how vital a durable roof is to protecting your home and following best practices for maintenance, you can save money in the long run while ensuring peace of mind for you and your family.

Comprehensive Guide to Choosing Trusted Roofing Professionals for Your Next Project

Selecting the right roofing professional for your project is a critical step in ensuring the quality, durability, and longevity of your roof. With so many options available, it can be overwhelming to decide which contractor is best suited for your needs. This guide provides key considerations and actionable steps to help you make an informed decision when choosing a trusted roofing professional.

1. Research Local Roofing Contractors

  • Online directories: Websites like Google My Business, Yelp, or Angi.
  • Word of mouth: Recommendations from friends, family, or neighbors.
  • Local trade associations: Check if the contractor is a member of reputable organizations like the National Roofing Contractors Association (NRCA).

A local contractor is more likely to understand regional building codes and weather-related challenges.

2. Verify Licenses and Certifications

Ensure that prospective contractors are licensed to operate in your state or region. Licensing requirements vary by location but typically confirm that the roofer meets minimum industry standards. Trusted professionals may also carry certifications from manufacturers like GAF or CertainTeed, indicating specialized training.

3. Assess Insurance Coverage

Type of Insurance Why It Matters
General Liability Protects your property from accidental damage during work.
Workers’ Compensation Covers injuries sustained by workers while on-site at your home.

Without sufficient insurance coverage, you could be held liable for damages or accidents.

4. Review Experience and Expertise

Roofing projects vary in complexity depending on materials used (e.g., asphalt shingles vs metal roofs) and structural considerations. Look for contractors who specialize in the type of roof you need installed or repaired.

Ask questions such as: – How long have they been in business? – Do they handle residential or commercial projects? – Can they provide examples of similar completed jobs?

5. Evaluate Warranties Offered

Reputable roofing professionals provide warranties that cover both materials and workmanship: – Manufacturer’s warranty: Covers defects in roofing materials. – Workmanship warranty: Addresses installation-related issues.

Understanding these warranties ensures peace of mind over potential future problems.

6. Request References

Ask for references from past clients who had similar projects done recently. Contact these references to inquire about their experience with timelines, communication, professionalism, and overall satisfaction with the work completed.

Sample Questions to Ask References: 1. Was the project completed within budget? 2. Did they clean up thoroughly after finishing? 3. Were there any unexpected costs?

7. Get Multiple Quotes

Avoid settling on the first quote you receive—request estimates from at least three different contractors to compare pricing without sacrificing quality.

When reviewing quotes: – Ensure all labor, materials, permits, and cleanup costs are included. – Avoid unusually low bids that may indicate subpar workmanship or hidden fees.

Contractor Name Estimate Cost Warranty Coverage Estimated Timeline
Contractor A $12,000 20 years (materials), 5 years (labor) 2 weeks
Contractor B $10,500 15 years (materials), 3 years (labor) 3 weeks

8. Check Online Reviews and Ratings

Browse platforms such as Google Reviews or Better Business Bureau (BBB) profiles for insights into previous customer experiences with specific contractors: – Look out for consistent positive feedback about punctuality and craftsmanship. – Be cautious if reviews mention recurring complaints regarding shoddy workmanship or delayed timelines.

9. Confirm Timeline Expectations

Set clear expectations about start dates and project duration before signing contracts: 1. When will work commence after accepting their quote? 2. How long will each phase take (e.g., tear-off vs installation)? 3. Are there potential weather-related delays factored into scheduling?

Open communication reduces misunderstandings later on.

10: Ensure Detailed Written Contracts

Before any work begins onsite ensure full documentation signed contract outlines important specifics e.g., timeline clearly spells warranty terms limits ensuring protects both parties disputes arise unexpectedly!

Roofing work Roofing work, the worker with an instrument in the background a country house roofer contractor stock pictures, royalty-free photos & images

Preventing Winter Damage to Commercial Roofs: Tips for Business Owners

Winter can be particularly harsh on commercial roofing systems, causing damage that leads to costly repairs or even premature replacement. Taking proactive steps to protect your commercial roof can save you time, money, and stress during and after the colder months. Below are key tips that business owners should consider to minimize winter-related damage.

Inspect Your Roof Before Winter Arrives

  • Roof Membrane: Check for cracks, blisters, or tears in the membrane.
  • Flashings: Ensure all flashings are properly sealed and secure around vents, chimneys, skylights, and HVAC units.
  • Gutters and Drains: Clear any debris from gutters and ensure proper drainage to prevent ice damming.
  • Fasteners: Inspect for loose or corroded fasteners holding the roofing system in place.

Regular inspections by a professional roofer will help catch issues early before they escalate due to harsh winter conditions.

Address Snow Accumulation Early

  • Snow Removal Plan: Hire a certified roofing contractor equipped with the right tools and training for safe snow removal. Avoid DIY methods that may harm the roof membrane.
  • Load Capacity Awareness: Understand your roof’s load capacity to determine when snow removal becomes critical. A professional engineer can provide this assessment if needed.
Snow Load Guidelines Impact
Less than 20 lbs per sq ft Generally safe
20–30 lbs per sq ft Monitor closely; removal may be needed
Over 30 lbs per sq ft Immediate action required

Prevent Ice Dams on Sloped Roofs

Ice dams form when heat escapes from the building’s interior through the roof, causing snow to melt and refreeze at eaves or gutters. This can result in water backing up under shingles or other materials.

Tips for Ice Dam Prevention:
  • Upgrade Insulation: Ensure proper attic insulation reduces heat loss.
  • Improve Ventilation: Install ridge vents or soffit vents for consistent airflow across the roof.
  • Heated Cables: Use electric heating cables along problem areas to prevent freezing.

Perform Regular Maintenance Throughout Winter

  1. Inspect after heavy snowfalls or ice storms for new damage.
  2. Clear debris promptly from rooftop drains.
  3. Monitor interior ceilings for leaks or water stains as an early warning sign of potential issues.
  4. Ensure HVAC equipment installed on rooftops is functioning correctly without causing excess vibration or drainage problems.

Partner with a Trusted Roofing Professional

Benefits include:
– Regular inspections scheduled seasonally. – Immediate response times following weather-related emergencies. – Detailed reports identifying vulnerabilities before significant failures occur.

Selecting experienced professionals ensures that your investment remains protected year-round while minimizing risks of downtime caused by unforeseen roofing issues during peak seasons of operation.

By adopting these preventative measures tailored specifically for winter challenges faced by commercial roofs, business owners can extend their lifespan while avoiding costly repairs in harsh climatic conditions.

Step-by-Step Guide to Preparing and Installing Roof Decks for Long-Lasting Performance

Proper preparation and installation of roof decks are crucial for ensuring the longevity, durability, and performance of your roofing system. Whether you’re a professional roofer or a homeowner taking on the challenge, understanding the right techniques and materials is essential. Below is a step-by-step guide to help you prepare and install roof decks effectively.

1. Assess the Structure

Before installing a new roof deck, inspect the existing structure for any signs of damage or weakness. Look for: – Rotting wood – Warped trusses – Termite damage – Structural instability

Make any necessary repairs or replacements to create a solid foundation for the roof deck.

2. Choose Quality Materials

The type of material you select will significantly impact the performance of your roof deck. Common materials include: – Plywood: Most commonly used, durable, and cost-effective. – OSB (Oriented Strand Board): Lightweight and widely available. – Tongue-and-Groove Boards: Often used in more traditional builds with higher aesthetic values.

Ensure that all materials meet local building codes and are compatible with the roofing system you plan to install.

Material Type Durability Cost Best For
Plywood High Moderate Most roofing applications
OSB Moderate Low Budget-friendly projects
Tongue-and-Groove High Expensive Visible ceilings

3. Measure and Cut Materials

Take accurate measurements of your roof’s dimensions before cutting any decking material. Use these tips: – Double-check all measurements to avoid waste. – Use power tools like circular saws for clean cuts. – Pre-drill holes if necessary to prevent splitting during installation.

4. Secure Decking Panels

Lay each panel across the roof trusses or rafters, maintaining proper spacing between boards for thermal expansion (usually an eighth-inch gap). Secure panels using galvanized nails or screws at intervals recommended by local codes.

Best practices when securing panels: – Begin installation from one corner. – Stagger joints between rows to increase strength. – Avoid over-driving fasteners as it can weaken the material.

5. Install Underlayment

After securing all decking panels, add an underlayment layer to protect against moisture infiltration. Options include: – Felt paper (15 or 30 lb.) – Synthetic underlayment for enhanced durability

This layer acts as an essential barrier between your decking material and shingles while offering added insulation benefits.

6. Address Ventilation Needs

Proper attic ventilation ensures that heat and moisture do not become trapped beneath the roofing system: – Install ridge vents or soffit vents where needed. – Check local codes regarding ventilation requirements for long-term efficiency.

Common Mistakes To Avoid During Installation

  1. Using Inferior Materials: Cheap materials might save money upfront but can lead to costly repairs later.
  2. Improper Fastening: Over-tightening screws can damage decking boards; under-tightening can cause instability.
  3. Neglecting Underlayment: Skipping this step exposes your deck to water damage over time.

By following these steps meticulously, you will create a stable base that supports your roofing system’s long-lasting performance while minimizing future maintenance needs.

How Starter Shingles and Flashing Play a Vital Role in Roof Installation

When it comes to roofing, every component plays an essential role in ensuring a durable, weather-resistant structure. Among these crucial elements, starter shingles and flashing are integral to the longevity and functionality of any roof. Understanding their purpose, benefits, and proper installation can help homeowners and roofing professionals achieve better results while protecting the integrity of the structure.

What Are Starter Shingles?

Starter shingles are the first layer of shingles installed along the edge of a roof. They serve as the foundation for subsequent layers by providing additional support and sealing protection at key areas prone to water infiltration.

Key Benefits of Starter Shingles:Waterproofing: Prevents water infiltration at vulnerable areas like eaves and rakes. – Wind Resistance: Creates a secure starting edge that resists wind uplift. – Improved Adhesion: Contains adhesive strips that bond with subsequent shingle layers. – Cost Efficiency: Reduces waste by eliminating the need to cut standard shingles for edges.

Proper Installation of Starter Shingles

  1. Clean the roof deck thoroughly, ensuring no debris or moisture is present.
  2. Apply underlayment as an added protective barrier beneath all shingles.
  3. Measure and mark guidelines along the eaves and rakes for precise alignment.
  4. Install starter shingles along these lines with adhesive strips facing upward toward the edge.
  5. Allow for slight overhangs at edges to direct water away from fascia boards and siding.
  6. Secure each piece using corrosion-resistant nails spaced evenly across the shingle.

What Is Roofing Flashing?

Flashing refers to thin, impervious material (often made from aluminum or galvanized steel) placed at joints or intersections on a roof to prevent water penetration. Common types of flashing include step flashing, drip edge flashing, valley flashing, and chimney flashing.

Where Flashing Is Used: – Around chimneys – At valleys where two slopes meet – Along dormer windows – Around vents or skylights – At roof edges (drip edges)

Importance of Flashing in Roof Installation

  1. Prevents Water Damage: Flashing acts as a barrier in areas most vulnerable to leaks. Without proper flashing, water can seep into seams or joints, leading to mold growth or structural decay.
  2. Enhances Durability: By channeling water away from critical points on your roof, flashing helps extend its lifespan while reducing long-term maintenance costs.
  3. Protects Structural Integrity: Properly installed flashing prevents moisture buildup that could compromise insulation or weaken wooden components within your home’s structure.

Tips for Installing Flashing Correctly

  • Aluminum is lightweight but can corrode in salty climates.
  • Copper is durable but costlier than other options.
  • Overlap each piece by 2–3 inches (5–8 cm) horizontally.
  • This ensures complete waterproofing around nails or screws used during installation.
Component Key Function Material Options Placement Areas
Starter Shingles Provides waterproof foundation & wind seal Asphalt-based Eaves & rake edges
Flashing Directs water away; prevents leaks Aluminum, steel, copper Chimneys, valleys & transitions

Properly incorporating starter shingles and adequate flashing into your roofing project ensures enhanced durability while safeguarding against severe weather conditions year-round. Prioritizing quality materials combined with professional installation techniques will yield lasting protection for any home or building structure.

Roofing Construction. Roofing Contractors Install New House Roofing with Asphalt Shingles Roofing Construction. Roofers with safety rope. Roofing Contractor. KYIV - UKRAINE SEPTEMBER - 29, 2012:  Roofing Construction. Roofing Contractors Install New House Roofing with Asphalt Shingles Roofing Construction. Roofers with safety rope. Roofing Contractor. roofer contractor stock pictures, royalty-free photos & images

How a Minneapolis MN Roofing Contractor Can Enhance Your Roof’s Longevity and Performance

Hip and ridge caps are often overlooked components in a roofing system, yet they play a significant role in protecting your roof while also improving its overall performance. These elements are designed to cover the seams where two roof slopes meet, such as at ridges and hips. Without properly installed hip and ridge caps, your roof is left vulnerable to water penetration, wind damage, and energy inefficiency. Below is an overview of their importance and how they contribute to the overall durability of your roof.

What Are Hip and Ridge Caps?

Hip caps cover the angled intersections (hips) where two downward-sloping sections of a roof meet, while ridge caps seal the horizontal line where two upward-sloping sections converge (the ridge). Typically made from asphalt shingles or other durable materials like metal or clay tiles, these elements provide both functional benefits and aesthetic enhancements.

Benefits of Properly Installed Hip and Ridge Caps

  1. Prevents water infiltration at vulnerable seams along ridges and hips.
  2. Shields the roof from wind uplift during storms or high winds.
  3. Helps resist damage caused by snow accumulation on sloped roofs.
  4. Improved Ventilation
    Many modern ridge cap systems are designed to incorporate ventilation features. These allow hot air from your attic to escape while preventing moisture buildup that can lead to mold or structural decay.
  5. Provides a finished look that complements the rest of your roofing system.
  6. Can be customized with various textures, colors, or materials for a seamless design.
  7. Prolonged Roof Longevity
    By sealing critical intersections, hip and ridge caps reduce wear-and-tear on adjacent roofing materials over time.

Types of Hip and Ridge Caps

Type Material Options Key Features Best For
Asphalt Shingles Fiberglass-reinforced Affordable, widely available Residential applications
Metal Caps Aluminum or steel Superior durability; corrosion resistant Modern designs
Clay Tile Caps Terracotta Aesthetic appeal; long-lasting Mediterranean-style roofs
Composite Materials Synthetic blends Lightweight; eco-friendly options Versatile for various styles

Installation Tips for Optimal Performance

Proper installation ensures that hip and ridge caps perform efficiently over time: – Ensure Compatibility: Use hip/ridge caps that match the material of your main roofing system. – Secure Fastening: Install with appropriate nails or adhesives designed for roofing applications. – Account for Ventilation Needs: Use vented ridge caps if improved airflow is necessary. – Overlap Correctly: Overlapping each piece appropriately prevents leaks at joints. – Professional Assistance: Always consult or hire experienced roofing contractors to avoid improper installation issues.

Final Thoughts on Maintenance

Regular inspections are critical when it comes to preserving hip and ridge cap performance:
– Check annually for any signs of cracks, loose materials, or wear due to weather exposure. – Remove debris such as leaves that may collect along ridges. – Replace damaged sections promptly to prevent further deterioration.

By investing in high-quality hip and ridge caps alongside proper installation practices, you can significantly extend the lifespan of your roof while maintaining its structural integrity over time.

The Role of Hip and Ridge Caps in Enhancing Your Roof’s Longevity and Performance

Hip and ridge caps are crucial components of any roofing system. They not only improve the aesthetic appeal of your roof but also provide essential protection against water intrusion, wind uplift, and other environmental factors. Let’s explore the significance of hip and ridge caps, their benefits, material options, and installation tips to maximize your roof’s lifespan.

What Are Hip and Ridge Caps?

Hip caps are installed along the edges where two sloping roof sections meet (the “hip” of a roof), while ridge caps are placed at the peak of a roof where two slopes converge (the “ridge”). These specialized shingles or roofing materials are designed to cover vulnerable joints on the roof. Without them, these areas can become weak points for water leaks or wind damage.

Benefits of Hip and Ridge Caps

  • Protection: They seal joints to prevent water infiltration, which helps avoid interior damage like mold or mildew growth.
  • Durability: Properly installed caps can withstand strong winds by ensuring that shingles stay secure at critical junctions.
  • Aesthetic Appeal: Hip and ridge caps give roofs a polished look by creating clean lines along high-profile areas.
  • Energy Efficiency: Some modern hip and ridge caps come with ventilation properties that help regulate attic temperature, reducing energy costs.

Types of Materials for Hip and Ridge Caps

Material Type Features & Benefits Ideal Roofing Types
Asphalt Shingles Affordable, commonly available, easy to match colors. Standard residential roofs
Metal Durable, lightweight, weather-resistant Metal roofs or modern designs
Wood Natural aesthetic appeal Cedar shake or rustic-style roofs
Composite Material Lightweight yet durable; mimics natural materials Versatile for various designs

Key Considerations When Choosing Hip and Ridge Caps

  1. Material Compatibility: Ensure that your chosen cap material matches your existing roofing system in both appearance and performance.
  2. Local Climate: Opt for weather-resistant materials if you live in an area prone to harsh conditions like heavy rain or snow.
  3. Ventilation Needs: Consider vented ridge caps if improved attic ventilation is necessary to maintain energy efficiency.
  4. Professional Installation: Improperly installed hip and ridge caps can lead to premature failure. Hiring experienced roofing professionals ensures long-lasting results.

Installation Tips for Longevity

  • Begin by laying down an underlayment over the ridges or hips for added waterproofing protection.
  • Use nails specifically designed for roofing applications to secure each cap shingle firmly in place.
  • Overlap each piece slightly to create a seamless barrier against moisture.
  • For vented ridge caps, verify that ventilation gaps align properly with attic vents to allow airflow.
  • Seal exposed nails with roofing adhesive or caulk for additional durability.

Maintenance Tips

  • Inspect these areas twice annually (spring/fall) for signs of wear such as cracks or loose shingles.
  • Clear debris like leaves or branches from ridges as buildup can lead to moisture retention.
  • If damage is detected during inspection—such as missing sections—schedule prompt repairs with a professional roofer.

Investing time into choosing high-quality materials while ensuring thoughtful installation will extend your roof’s lifespan significantly. A well-maintained set of hip and ridge caps enhances both structural integrity and overall performance year after year—protecting what matters most beneath it all.


Read MoreRead More

Maximize Benefits by Choosing a Minneapolis MN Roofing Contractor for Your Roof ReplacementMaximize Benefits by Choosing a Minneapolis MN Roofing Contractor for Your Roof Replacement

Back view of contractor worker in blue overalls is repairing a red roof with electric screw driver. Back view of contractor worker in blue overalls is repairing a red roof with electric screw driver.  Roofing concept. Copy space for you text roofer contractor stock pictures, royalty-free photos & images

Replacing your roof is a significant investment, and timing plays an essential role in maximizing both the efficiency and cost-effectiveness of the project. Choosing the right time of year can help ensure optimal working conditions for contractors, better material performance, and potential savings on costs. Below, we explore seasonal considerations to help you decide when to schedule your roof replacement.

Spring: A Balanced Option

Spring can be an ideal time for roof replacement due to moderate weather conditions.
Mild Temperatures
Contractor Availability: Contractors may have more availability compared to the busier summer or fall months.
Avoiding Peak Storm Seasons: Addressing roof issues in spring prepares your home for potential heavy rains or storms later in the year.

However, spring weather can also be unpredictable with sudden rain showers; it’s crucial to monitor forecasts closely before planning a project.

Summer: Popular but Challenging

Summer is one of the most common seasons for roof replacements due to clear skies and consistent warm temperatures.
Predictable Weather: Minimal risk of rain interruptions ensures a smoother workflow for contractors.
Longer Daylight Hours: Extended daylight allows projects to progress faster, reducing labor costs and completion time.

Fall: The Ideal Season for Roof Replacement

For many homeowners, fall stands out as the best season for replacing a roof.
Optimal Temperatures: Cool but not freezing temperatures ensure that adhesives and materials set properly without delays.
Stable Weather Conditions: Fall typically provides dry days with minimal precipitation risks.Preparing Ahead of Winter: Replacing your roof before harsh winter snow prevents further damage from leaks or ice dams.

Fall schedules often fill up quickly due to high demand in most regions—booking early is essential if this season appeals to you.

Winter: An Off-Peak Choice with Considerations

While winter may seem less suitable for roofing projects due to cold temperatures and snow, there are circumstances where it could work well: – Lower Costs & Discounts: Contractors may offer reduced rates during their off-season.Faster Scheduling Availability: Since fewer homeowners opt for winter work, you’re more likely to book at your preferred timeslot.

– Snow or ice-covered roofs make installation hazardous and slower for crews.

Factors Beyond Seasons

While seasonal considerations are important, additional factors can influence when you should replace your roof: 1.Roof Condition:2.Budget Considerations:Off-season projects (like winter) might save money on labor costs. 3.Material Choice:Certain materials perform better under specific temperature ranges; consult your contractor about recommendations based on local climate conditions.

Season Pros Cons
Spring Mild temps, contractor availability Potential rain delays
Summer Predictable weather Heat affecting materials
Fall Optimal temps & stable weather High demand limits availability
Winter Cost savings Adhesion challenges & safety risks

By carefully weighing these seasonal pros and cons against your unique circumstances—such as budget constraints or urgency—you’ll be better equipped to choose the perfect time of year for replacing your roof efficiently while ensuring long-term quality performance.

Top Reasons to Hire a Minneapolis Roofer for Your Roof Replacement

A roof is one of the most critical components of your home, offering protection from the elements and adding to its overall structural integrity. Over time, however, roofs wear out and may require replacement. Understanding when and why you should replace your roof is crucial for maintaining your home’s safety, energy efficiency, and value.

Essential Signs You Need a Minneapolis MN Roof Replacement

  • Sagging Roofline: A sagging appearance could suggest structural issues that may necessitate immediate replacement.
  • Moss or Algae Growth: While common in humid climates, excessive moss can trap moisture and cause long-term damage if not addressed.

Top Benefits of Minneapolis MN Roof Repair and Replacement

Choosing to replace an aging or damaged roof provides several advantages that go beyond basic functionality.

Enhanced Energy Efficiency

New roofing materials are often more energy-efficient than older ones. For example: – Metal roofs with reflective coatings can reduce cooling costs during summer months.

Improved Home Value

Replacing an outdated roof enhances curb appeal and increases property value—a significant advantage if you plan to sell in the near future.

Roofing Type Average Lifespan Added Resale Value (%)
Asphalt Shingles 20–25 years 60–65%
Metal Roofing 40–70 years 85%
Wood Shingles/Shakes 30 years 50–55%

Better Protection Against Weather Events

A new roof ensures better resistance against severe weather conditions such as windstorms, hail, snow accumulation, or heavy rains. Modern materials are engineered to withstand harsh environments more effectively.

Opportunities for Upgrades

Roof replacement offers an opportunity to upgrade features such as: – Adding proper ventilation systems. – Opting for impact-resistant roofing materials that perform well in extreme conditions. – Installing solar panels for renewable energy solutions.

Timely Minneapolis MN Roof Installation to Avoid Costly Repairs

Delaying a necessary roof replacement often leads to more extensive—and expensive—damage down the road. For instance: 1. Persistent leaks can cause rot in structural components like rafters. 2. Mold growth due to trapped moisture can pose health risks while requiring costly remediation services. 3. Higher utility bills may result from poor insulation caused by worn-out roofing materials.

Taking proactive steps ensures these issues do not escalate further.

Investing in a new roof when it’s needed is essential for maintaining both the safety and efficiency of your home over time. By recognizing key signs of wear and understanding its broader benefits, you’ll make informed decisions that save money while ensuring long-term peace of mind.

How a Minneapolis MN Roofing Contractor Can Help You Save on Home Insurance Costs

Replacing your roof can be a significant investment, but it may also lead to substantial savings on your home insurance costs. Insurance companies assess risks associated with your home, and an updated roof can reduce these risks, resulting in more favorable premiums. Below is an exploration of how replacing your roof can positively impact your insurance costs.

How Roof Replacement Affects Insurance Rates

  1. Improved Safety and Durability
    A new roof made from high-quality materials minimizes the likelihood of leaks, structural damage, or collapse during extreme weather events. Insurers often see this as reduced risk and may reward homeowners with lower premiums.
  2. Compliance with Building Codes
    Modern roofs are designed to meet current building standards, including wind and fire resistance requirements. Upgrading to a roof that complies with these codes makes your home safer and more insurable at a lower cost.
  3. Use of Impact-Resistant Materials
  4. Energy Efficiency
    Some insurers provide incentives for homeowners who install energy-efficient roofs, such as those with reflective coatings or solar panels. These features not only save on energy bills but may also qualify you for special green-home insurance discounts.

Male Roof Contractor Reviews Project Progress. Roof Contractor Inspects Progress In New House Construction And Roof Installation. roofer contractor stock pictures, royalty-free photos & images

Types of Roofing Materials That Could Lower Insurance Costs

Insurance providers often evaluate the type of roofing material when calculating premiums.

Roofing Material Durability Rating Fire Resistance Potential Premium Reduction
Asphalt Shingles Moderate Low/Moderate Minimal
Metal Roofing High High Significant
Tile Roofing (Clay/Concrete) High High Moderate
Slate Roofing Very High Very High Significant

Questions to Ask Your Insurance Provider Before Replacing Your Roof

To maximize potential savings, consult with your insurance provider before undertaking a roofing project.

  • Are there specific roofing materials that qualify for premium discounts?
  • Does my current policy offer benefits for replacing my roof?
  • Will I need additional certifications or inspections for insurance savings?

Additional Considerations

When planning a roof replacement to benefit from reduced insurance costs:
– Ensure the contractor is licensed and insured, which protects you against liability during installation. – Keep records of installation documents, warranties, and receipts; these might be needed when applying for discounts. – Check if your region offers tax credits or rebates for certain energy-efficient or disaster-resilient roofing choices.

By strategically investing in a new roof that meets modern standards and aligns with insurer preferences, you can enjoy both long-term protection for your home and noticeable reductions in your yearly insurance premiums.

Understanding How Your Roof Impacts Your Home Insurance Rates

Your roof plays a critical role in determining the cost and coverage of your home insurance policy. Insurance providers evaluate multiple factors when calculating premiums, with the condition, material, and age of your roof being significant considerations. A well-maintained roof not only protects your home but can also positively influence your insurance rates. Below is an in-depth look at how your roof impacts home insurance costs and what you can do to optimize these benefits.

Factors That Influence Insurance Rates

  1. Older roofs are more prone to wear and tear, increasing the likelihood of damage during storms or heavy weather events.
  2. Many insurers offer discounts for newer roofs as they are less likely to need repairs or replacements.
  3. Some policies may limit coverage or require higher deductibles for roofs over 20 years old.
  4. Roofing Material
    Certain roofing materials are more durable and resistant to damage, which can lower risk in the eyes of insurers:
  5. Metal Roofing:Fire-resistant and long-lasting, often qualifying for better rates.
  6. Asphalt Shingles:Common but with varying durability based on quality.
  7. Clay Tiles:Extremely durable but may lead to higher premiums due to repair costs.
  8. Roof Condition
    Regular maintenance is essential.
  9. Leaks or water damage.
  10. Moss or other growth that could indicate neglect.
  11. Location and Weather Resistance
  12. Roofs designed to withstand high winds may receive better coverage terms in coastal regions.

Tips to Improve Insurance Rates Through Roofing

  • Invest in Routine Maintenance:Schedule regular inspections by a professional roofer to identify any repair needs early.
  • Upgrade Materials:g.
  • Install Safety Features:Adding features like storm shutters, reinforced fasteners, or secondary water barriers can enhance protection against extreme weather.
  • Document Improvements:Keep records of all repairs and upgrades made to your roof as proof for insurance purposes.

Sample Cost Table Based on Roofing Materials

Roofing Material Average Lifespan Insurance Impact Notes
Asphalt Shingles 15-30 Years Moderate Most common; varies by quality
Metal Roofing 40-70 Years Positive (fire & impact resistance) Higher upfront cost
Clay/Concrete Tiles 50+ Years Depends on location (durability vs cost) Heavy; suited for specific climates
Wood Shakes/Shingles 20-40 Years Negative (fire risk) Requires frequent maintenance

Importance of Communication With Your Insurer

  • Notify them immediately after a new installation or major repair.
  • Ask about discounts specific to energy-efficient materials or storm-resistant designs.
  • Ensure all relevant documentation is submitted promptly.

Understanding how your roof impacts home insurance rates empowers homeowners to make informed decisions about roofing choices while optimizing their policy benefits effectively.

What to Do When Your Roof is Damaged and It’s Raining

Dealing with a damaged roof during rainfall can be stressful and overwhelming. Water intrusion can lead to significant property damage if not addressed promptly. The following steps can help homeowners manage the situation effectively while minimizing potential harm.

Safety should always come first when dealing with roof damage, especially during inclement weather.
– Avoid entering any rooms where water is dripping or pooling near electrical fixtures or outlets.

– Use protective gear such as gloves and boots when handling leaks or debris.

Finding the origin of a leak is critical in addressing roof damage, even if it’s only temporary until professionals arrive:
– Inspect ceilings for water stains to identify where water is entering your home.
– Check your attic for signs of moisture buildup or dripping water using a flashlight.

Until professional repairs can be conducted, temporary fixes can help mitigate further issues:
– Use waterproof tarps or heavy-duty plastic sheeting to cover exposed areas of your roof that are accessible without risk. – Place buckets or containers under leaks inside your home to catch water and protect flooring. – Move furniture, electronics, and valuables away from affected areas to prevent additional losses.

Temporary Fix Guide Tools Required Effectiveness Level
Tarp Installation Heavy-duty tarp, nails/clips, rope High (short-term solution)
Internal Catchment System Buckets/containers Moderate
Roof Patch Spray Roofing sealant spray Low (only in light rain)

Professional assistance is essential when dealing with structural damage caused by rain:
– Choose a licensed roofing contractor with experience in emergency repairs. They will have the tools and expertise needed for thorough inspections and long-term solutions. – Document all visible damage by taking photos or videos before repair work begins; this will be useful when filing an insurance claim.


– Provide evidence such as photos or videos of both interior and exterior damages. – Review your policy documentation beforehand so you understand what coverage options are available for storm-related roof issues.

Preventative Steps for Future Rainstorms

After addressing immediate concerns following roof damage during rain, consider these preventative measures:
1. Schedule regular inspections with roofing professionals to identify potential weaknesses before they escalate into emergencies. 2. Invest in high-quality materials designed specifically for durability against heavy rain conditions. 3. Clear gutters periodically since blockages contribute significantly toward moisture retention near vulnerable sections.

Taking proactive steps ensures your home stays better protected in adverse weather conditions while avoiding recurring problems associated with inadequate maintenance practices over time.


Read MoreRead More

9 Essential Factors to Consider When Choosing the Right Minneapolis Roofer9 Essential Factors to Consider When Choosing the Right Minneapolis Roofer

Natural roof tile instaalation. Roof with mansard windows. Natural roof tile instaalation. Roofer builder worker use ruller to measure the distance between the tiles.  Roof with mansard windows. roofer contractor stock pictures, royalty-free photos & images

1. Verify Licensing and Insurance

  • Licensing: Ensure the contractor holds valid state or local licenses as required by law. This demonstrates their compliance with industry standards.
  • Insurance: Confirm they have adequate liability insurance and worker’s compensation coverage. This protects you from financial responsibility in case of accidents or damages during the project.

2. Reputation and Reviews

A contractor’s reputation speaks volumes about their reliability and skill: – Check online reviews on platforms like Google, Yelp, or Better Business Bureau (BBB).
– Ask for references from previous clients to understand their experience working with the contractor.

3. Local Experience

Hiring a local roofing contractor has multiple advantages: – They are familiar with local building codes, weather conditions, and materials suited for the area.
– Local businesses tend to be more accessible for follow-ups or warranty claims.

4. Written Estimates

Request detailed written estimates from potential contractors: – Include costs for materials, labor, permits, and other additional expenses. – A clear estimate prevents misunderstandings and ensures transparency throughout the project.

5. Warranties Offered

There are two types of warranties to evaluate:
1. Manufacturer’s Warranty: Covers defects in roofing materials. 2. Workmanship Warranty: Protects against installation errors by the contractor.

Choose a contractor who offers robust warranties for peace of mind.

6. Experience and Specialization

Evaluate how long they’ve been in business and whether they specialize in specific types of roofs (e.g., asphalt shingles, metal roofing). Experienced contractors often deliver higher-quality results due to years of expertise.

Type of Roof Example Materials Specialized Contractor Required?
Asphalt Shingles Fiberglass shingles Often generalized
Metal Roofing Aluminum or steel panels Yes
Tile Roofing Clay or concrete tiles Yes

7. Communication Skills

Effective communication is key during any home improvement project: – Ensure they respond promptly to inquiries. – A reliable contractor will keep you updated at every stage—before, during, and after completion.

8. Project Timeline

Discuss timelines upfront: – Understand how long your project will take. – Be cautious of contractors who promise unusually short deadlines; this may indicate rushed work that sacrifices quality.

9. Payment Terms

Clarify payment schedules in advance: – Avoid contractors who demand full payment upfront. – Typically, payments are divided into installments—a down payment followed by progress payments as milestones are achieved.

By thoroughly considering these nine factors when selecting a roofing contractor, you’ll not only safeguard your investment but also ensure your roof is built or repaired with care and expertise tailored to your needs.

The Ultimate Guide to Choosing a Minneapolis MN Roofing Contractor for a Durable Roof

Roof restoration is a critical process that enhances the lifespan, functionality, and appearance of your roof. Whether you’re dealing with aging materials, damage from weather conditions, or just general wear and tear, undertaking a roof restoration project can save you from costly replacements. Below is a comprehensive guide to help you navigate this endeavor effectively.

Top Benefits of Hiring a Minneapolis MN Roofing Contractor for Roof Restoration

  • Extends Roof Life: Proper restoration can add 10-15 years to the life of your roof.
  • Energy Efficiency: Reflective coatings or advanced materials used in restorations can improve energy efficiency by regulating indoor temperatures.
  • Cost Savings: Compared to full roof replacement, restoration is often significantly less expensive while achieving similar results.
  • Enhanced Property Value: A well-maintained roof boosts curb appeal and increases overall property value.
  • Environmental Impact: Restoration reduces waste by minimizing the need for complete roofing material disposal.

Essential Steps for Minneapolis MN Roof Replacement

  1. Identify issues such as leaks, cracks, or sagging areas using professional inspection techniques.
  2. Assess whether the damage requires minor repairs or more extensive interventions.
  3. Clear debris, dirt, moss, and algae buildup through high-pressure washing or eco-friendly cleaning solutions.
  4. This step ensures a clean surface for efficient application of coatings or sealants.
  5. Fix structural flaws such as broken tiles, loose shingles, or rusted metal sheets.
  6. Address leaks by sealing gaps around chimneys, vents, and flashings.
  7. Use UV-resistant paint or waterproof sealants to protect against harsh weather conditions.
  8. Opt for specialized coatings like elastomeric membranes to prevent future deterioration.
  9. Conduct a final review to ensure all repairs and restorations meet industry standards.
  10. Evaluate workmanship quality before signing off on the project.

Materials Commonly Used in Minneapolis MN Roof Repair

Material Type Features Recommended For
Elastomeric Coatings High flexibility; waterproofing properties Flat roofs; commercial buildings
Acrylic Paints UV resistance; aesthetic appeal Residential properties
Metal Sheeting Repairs Rust-resistant; durable Industrial structures
Bitumen-Based Products Strong weatherproofing ability Harsh climates

Essential Signs You Need Minneapolis MN Roof Installation

  • Frequent leaks during rainfall.
  • Cracked or curling shingles.
  • Accumulation of mold or moss growth.
  • Noticeable dips or sagging areas on flat roofs.
  • Rusted metal components such as flashing or gutters.

Proactively addressing these signs can prevent further damage and reduce repair costs over time.

Expert Tips for Long-Term Maintenance Post-Restoration

  • Schedule annual inspections with certified roofing professionals.
  • Clean gutters regularly to avoid water pooling near critical areas.
  • Trim surrounding trees to prevent debris accumulation.
  • Apply touch-up sealants every few years if needed based on climate exposure.

By following these steps and working with experienced professionals who use quality materials, you’ll not only extend your roof’s longevity but also safeguard your home from future complications associated with neglecting its condition.

The Ultimate Guide to Roof Restoration: Expert Tips and Insights for a Durable Roof

Roof restoration is an essential aspect of maintaining the structural integrity and longevity of your home. Over time, exposure to weather conditions and natural wear can compromise the roof’s strength, leading to costly repairs if not addressed promptly. Restoring your roof not only enhances its durability but also improves the overall appearance and value of your property. Below, we explore expert tips and insights for achieving a durable roof through proper restoration techniques.

Understand When Roof Restoration Is Necessary

  • Leaks or Water Damage: Stains on ceilings or walls often signal water penetration through the roof.
  • Broken or Missing Shingles/Tiles: Damaged roofing materials leave your home vulnerable to leaks.
  • Sagging Areas: Structural weaknesses caused by moisture buildup or aging can lead to sagging.
  • Moss, Mold, or Algae Growth: These elements not only affect aesthetics but also reduce a roof’s lifespan.
  • Increased Energy Bills: A poorly insulated or damaged roof often struggles with temperature regulation.

Identifying these signs early can save you significant expenses down the road.

Steps Involved in Roof Restoration

  1. Conduct a thorough inspection of the roof to identify problem areas. Hire a professional roofer if you’re unsure how to assess damage effectively.
  2. Remove dirt, moss, algae, and debris using high-pressure cleaning equipment. This process preps the surface for further work.
  3. Fix cracks, replace broken tiles/shingles, seal leaks, and address any structural issues found during inspection.
  4. Apply weather-resistant coatings or paint designed specifically for roofs. This helps protect against UV rays and harsh weather conditions while improving aesthetics.
  5. After completing the restoration process, ensure all aspects have been addressed properly by performing another inspection.

Benefits of Roof Restoration

  • Enhanced Durability: Proper restoration ensures your roof withstands environmental stressors.
  • Cost Savings: Addressing minor issues early reduces the likelihood of costly replacements later.
  • Improved Energy Efficiency: Sealing leaks prevents air loss, helping maintain indoor temperatures more effectively.
  • Boosted Property Value: A well-maintained roof improves curb appeal and increases resale potential.
  • Environmentally Friendly Option: Restoring rather than replacing minimizes waste sent to landfills.

Common Mistakes During Roof Restoration

Mistake Consequence
DIY Restoration Lack of expertise can worsen damage
Using Low-Quality Materials Reduces durability of repairs
Ignoring Inspections Overlooks hidden structural issues
Postponing Maintenance Leads to heightened repair costs

Work with qualified roofing professionals who use high-quality materials for optimal results.

Tips for Maintaining Your Restored Roof

  • Conduct regular inspections every six months or after severe weather events.
  • Keep gutters clean to prevent water pooling on your rooftop.
  • Trim nearby trees that may drop branches onto your structure.
  • Address minor damages immediately before they escalate into larger problems.

Proper care after restoration extends its lifespan significantly while saving money over time.

Restoration is an investment in both protection and aesthetics for homeowners looking to extend their roof’s life responsibly. By following these expert recommendations and partnering with trusted professionals, you’ll ensure that your home remains secure under a robust roofing system year after year.

Worker on roof installing gutter Roofer builder worker finishing folding gutter. He is up a ladder, photo taken from ground looking up, low angle view. He wears a tool belt, sky and clouds roofer contractor stock pictures, royalty-free photos & images

Colorbond Roofing and Its Growing Popularity in Modern Architecture

Colorbond roofing has gained significant attention in modern architecture due to its durability, versatility, and aesthetic appeal. This type of roofing isn’t just a practical solution for protecting homes from the elements—it also offers a sleek and contemporary design that aligns with today’s architectural trends. Below, we explore why Colorbond roofing continues to grow in popularity.

Advantages of Colorbond Roofing

  1. Made from high-quality steel, Colorbond roofs are built to withstand harsh weather conditions such as heavy rain, strong winds, and intense sun exposure.
  2. The material is resistant to rust, corrosion, and fading over time.
  3. Many Colorbond roofing products come with advanced thermal insulation properties that help regulate indoor temperatures.
  4. The reflective coating reduces heat absorption, lowering energy consumption for air conditioning during warmer months.
  5. Unlike traditional roofing materials like tiles or shingles that may crack or break over time, Colorbond requires minimal upkeep.
  6. Its surface resists dirt build-up and can be cleaned easily with periodic washing.
  7. Available in a variety of shades and finishes to suit modern architectural styles—from bold statement colors to neutral tones that blend with natural landscapes.
  8. Homeowners can customize their roofs to complement their property’s exterior design.
  9. Made from recyclable steel materials, making it an environmentally conscious choice for sustainable construction projects.
  10. Its longevity reduces the frequency of replacements, minimizing waste over time.

Applications in Modern Architecture

Colorbond roofs are not limited to residential homes—they are widely used across commercial buildings, schools, warehouses, and even industrial spaces due to their visual appeal and functionality.

  • Flat Roof Designs: Perfect for minimalist architectural styles where clean lines and low-profile structures dominate.
  • Sloped Roofs: Enhances traditional home designs while incorporating a modern twist.
  • Outdoor Spaces: Used for pergolas or patio coverings due to their lightweight nature without compromising strength.

Comparison Table: Colorbond Roofing vs Traditional Roofing Materials

Feature Colorbond Roofing Traditional Materials (e.g., Tiles/Shingles)
Durability Highly durable; long-lasting Prone to cracking or breaking over time
Weather Resistance Excellent resistance Moderate resistance; may require repairs
Maintenance Low maintenance Higher maintenance needs
Customization Options Wide range of colors Limited selection
Environmental Impact Recyclable; eco-friendly Often non-recyclable

Is Colorbond Roofing Right for You?

If you’re looking for a cost-effective yet stylish solution for your roof that aligns with modern design standards while offering long-term value, Colorbond is worth considering. It balances functionality with aesthetics beautifully—making it an increasingly popular choice among architects and homeowners alike.

Make sure you consult with an experienced roofer who specializes in installing Colorbond products to ensure optimal results tailored to your project needs.

How to Evaluate Completed Roofing Projects Before Choosing a Contractor

Choosing the right roofing contractor is crucial for ensuring the longevity, safety, and aesthetic appeal of your roof. One of the most effective ways to make an informed decision is by evaluating completed roofing projects. By examining their past work, you can gauge a contractor’s skill level, professionalism, and attention to detail. Here’s how you can effectively evaluate these projects before selecting a contractor.

Visit Previous Projects in Person

  • Quality of Materials: Check whether premium-quality materials have been used.
  • Workmanship: Look for any visible signs of poor craftsmanship like uneven shingles or improper alignment.
  • Durability Over Time: If possible, examine roofs that are several years old to gauge how well they hold up over time.

Ask for a Portfolio or Gallery of Work

  1. High-quality images from different angles.
  2. Before-and-after photos highlighting the transformation.
  3. Details about project specifications (e.g., materials used and style).

Pay special attention to roofs similar to your own in terms of style and material.

Check Online Reviews and Testimonials

  • Google My Business
  • Yelp
  • Better Business Bureau (BBB)
  • HomeAdvisor or Angi

Look for reviews that specifically mention completed project quality, adherence to timelines, and post-project support.

Common Questions to Address When Reading Reviews:

  • Did customers mention satisfaction with the final result?
  • Were there recurring complaints about issues like leaks or subpar materials?
  • How does the contractor handle follow-up services?

A mix of positive feedback and how contractors respond to negative reviews will provide deeper insight into their reliability.

Ask Specific Questions About Completed Jobs

  1. What challenges did they encounter during particular jobs?
  2. How do they ensure quality control throughout the process?
  3. Do they provide warranties on both labor and materials?

Their answers will give you clarity on how seriously they take their work.

Compare Project Pricing vs Quality

It’s important not only to look at visual results but also understand whether a project aligns with your budget expectations without compromising quality.

Contractor Material Used Cost Per Square Foot Warranty Period
Contractor A Asphalt Shingles $5 15 years
Contractor B Metal Roofing $8 20 years
Contractor C Tile Roofing $10 25 years

By comparing similar types of projects across contractors, you’ll get an idea if pricing reflects value.

Speak With Past Clients

  • Ask about their overall satisfaction.
  • Inquire about any lingering issues after project completion.
  • Confirm whether timelines were adhered to.

Direct conversations often reveal insights that reviews may not fully capture.

A close-up of asphalt shingles installation on the roof edge. A roofer is nailing asphalt shingles to the roof deck covered with roofing underlayment. Roofing construction. A close-up of asphalt shingles installation on the roof edge. A roofer is nailing asphalt shingles to the roof deck covered with roofing underlayment. Roofing construction. roofer contractor stock pictures, royalty-free photos & images

Look for Consistency Across Multiple Projects

Consistency is key when evaluating completed jobs. Does each project adhere to high standards regardless of size? A reliable roofer will display consistent quality across residential and commercial installations alike.

Pay attention to details such as: – Clean lines around edges – Proper flashing installation – Minimal waste left behind after job completion

Such elements indicate professionalism and thoroughness in every job they undertake.

By carefully evaluating these factors while reviewing completed roofing projects, you’ll be better prepared to select a contractor who meets your needs effectively and delivers lasting results tailored to your property’s requirements.

How to Evaluate Completed Roofing Projects Before Choosing a Contractor

Hiring the right roofing contractor involves careful research and evaluation. One of the most effective ways to assess a contractor’s skill level and quality of work is by evaluating their previous projects. By taking a closer look at completed roofing jobs, you can determine whether a contractor meets your standards and expectations. This guide explains key steps to help you evaluate completed roofing projects effectively.

1. Inspect the Quality of Materials Used

The durability and longevity of a roof largely depend on the materials utilized in its construction or repair. Ask the contractor about the specific brands and types of materials they used for past projects. When reviewing their completed jobs, check for:
Shingle Patterns: Are shingles aligned correctly without visible gaps?
Metal Flashing: Is flashing secure around chimneys, vents, or skylights?
Sealants: Are sealants evenly applied to prevent water intrusion?

Quality materials not only improve aesthetics but also ensure the roof will withstand harsh weather conditions.

2. Look for Attention to Detail

A professional roofing job is characterized by precision and attention to detail. When reviewing completed projects:
– Examine edges and seams – Are they cleanly finished?
– Check for proper installation of gutters – Do they align correctly with downspouts?
– Verify uniformity in color and texture – Does everything look cohesive and polished?

Attention to these details reflects a contractor’s commitment to delivering top-quality craftsmanship.

3. Assess Overall Aesthetic Appeal

The visual aspect of a roof contributes significantly to curb appeal, especially if you’re considering selling your property in the future. Evaluate whether:
– The roof complements the architectural style of the building.
– There are any noticeable mismatches in color or material between different sections.

A visually appealing roof indicates that care was taken throughout installation.

4. Speak with Past Clients or Read Reviews

Questions for Past Clients What You’ll Learn
Was the project completed on time? Timeliness & reliability
Were there any unexpected costs? Transparency in pricing
Have there been any issues since completion? Long-term satisfaction/quality
Would you hire this contractor again? Client loyalty levels

Online reviews can also provide insights into recurring themes, such as consistent punctuality or unresolved complaints.

5. Visit Projects Completed Recently vs Years Ago

Reviewing both recent work as well as older projects allows you to gauge consistency over time:
– For newer roofs, focus on installation precision and overall appearance. – For older roofs (5+ years), assess how well they’ve aged under various weather conditions—any signs of deterioration may indicate subpar workmanship or inadequate materials.

This dual approach ensures you get a full understanding of long-term performance outcomes.

6. Verify Compliance with Building Codes & Standards

Roofing contractors must adhere to local building codes and safety regulations when completing their projects. During evaluations, confirm that:
– Roof slope requirements have been met (especially for water drainage).
– Ventilation systems comply with code requirements for airflow efficiency. – Additional installations like solar panels follow relevant guidelines.

Non-compliance could lead to costly fines or repairs down the line.

By systematically evaluating these factors across multiple completed projects, you’ll gain a clearer picture of a roofing contractor’s expertise and reliability before making your decision.


Read MoreRead More

Step-by-Step Guide for Homeowners from a Minneapolis MN Roofing ContractorStep-by-Step Guide for Homeowners from a Minneapolis MN Roofing Contractor

handyman using nail gun to install shingle to repair roof handyman using nail gun to install shingle to repair roof roofer contractor stock pictures, royalty-free photos & images

Installing roof shingles can be a rewarding project for homeowners willing to tackle the task. However, it requires proper preparation and knowledge to ensure the roof is both functional and durable. Below is a step-by-step guide to help you navigate the process of installing roof shingles.

Step 1: Prepare the Roof Surface

Before you begin shingle installation, it’s crucial to prepare your roof surface properly.

  • Clean the surface:Remove any debris, old nails, or leftover materials from previous roofing.
  • Inspect for damage:Check the underlayment and roof decking for signs of rot or damage. Replace any compromised sections before proceeding.
  • Install drip edge:Nail a metal drip edge along the edges of your roof to prevent water infiltration.

Step 2: Install Roofing Underlayment

The underlayment acts as an additional layer of protection against moisture.

  1. Choose a quality underlayment material such as felt paper or synthetic options.
  2. Roll out the underlayment horizontally across the roof, starting at the bottom edge.
  3. Overlap each row by 4-6 inches, ensuring no gaps are left uncovered.
  4. Secure it with roofing nails or staples according to manufacturer recommendations.

Step 3: Mark Guidelines

Use chalk lines to create guidelines on your roof. These lines will help ensure straight rows of shingles during installation.

  • Measure and mark a straight line every 5 inches (or according to shingle specifications).
  • Work from bottom-to-top while ensuring uniform alignment throughout.

Step 4: Start Laying Shingles

Begin laying shingles at the bottom edge of your roof and work upwards in overlapping rows.

Procedure:
– Lay down starter shingles along the eaves to provide extra protection against water damage. – Place each shingle so that it overlaps halfway over the one below. – Use roofing nails (typically four per shingle) to secure them in place while avoiding overdriving nails.

Tips for Nailing:
| Nail Placement | Description | Importance |
|—————–|———————————-|—————————————|
| Above cutouts | Keep nails above shingle cutouts | Prevents leaks and improves stability |
| Straight angle | Insert nails at direct angles | Avoids damaging shingles |

Step 5: Address Valleys and Ridges

Valleys and ridges require special attention since they are prone to water accumulation.

For valleys: – Use a woven or closed-cut valley method depending on personal preference or material type. For ridges: – Install ridge cap shingles by overlapping them across peaks, securing with nails on either side.

Step 6: Final Inspection

Once all shingles are installed: 1. Remove any loose debris from your workspace. 2. Conduct visual checks for misaligned or improperly nailed shingles. 3. Test for secure placement by gently tugging at edges near critical areas (e. g. , valleys, vents).

By following these steps carefully, homeowners can achieve professional-looking results while prolonging their roof’s lifespan through proper technique and attention-to-detail.

Minneapolis Roofer Safety Tips to Ensure a Secure Work Environment

Maintaining safety while working on roofing projects is critical for both professional roofers and homeowners alike. Roof-related accidents can lead to severe injuries or even fatalities if proper precautions are not taken. This guide provides practical tips and best practices to ensure a secure work environment when handling roofing tasks.

Common Roofing Hazards

  • Falls from Heights: The leading cause of injuries in roofing projects.
  • Weather-Related Risks: Slippery surfaces due to rain or ice.
  • Tool and Equipment Accidents: Mishandling tools such as nail guns or saws.
  • Electrical Hazards: Proximity to power lines or exposed wiring.
  • Material Handling Injuries: Lifting heavy shingles or equipment incorrectly.

By recognizing these risks, workers can take proactive measures to minimize potential dangers.

Essential Safety Tips for Roofing Projects

  1. Use a properly fitted harness with an anchor point when working at heights.
  2. Wear non-slip, rubber-soled shoes designed for traction on sloped roofs.
  3. Protect your hands with durable gloves, and always wear safety glasses.
  4. Before starting any roofing project, inspect the roof for debris, hazardous conditions, or weak sections that might collapse under your weight.
  5. Ensure that ladders are stable and placed on level ground.
  6. Choose a ladder that extends at least three feet above the roofline for added stability when stepping onto the roof.
  7. Secure the ladder at its base and top to prevent slipping or tipping over.
  8. Maintain a safe distance from overhead power lines at all times.
  9. Never use metal ladders near electrical wires, as they can conduct electricity.
  10. Avoid working on roofs during bad weather conditions such as heavy rain, high winds, or extreme heat.
  11. Wait until surfaces are dry before starting any work to reduce slipping risks.
  12. Keep tools organized in tool belts or pouches to avoid cluttering the roof surface.
  13. Store materials like shingles and nails securely so they don’t slide off the roof unexpectedly.
  14. Having another person present improves overall safety by allowing one individual to provide assistance if an accident occurs.
  15. Communication is key—use hand signals or radios when needed.

Recommended Safety Equipment Checklist

Equipment Purpose
Harness with Anchor Points Fall prevention
Non-Slip Shoes Enhanced traction
Hard Hat Protects against falling objects
Safety Glasses Eye protection from dust/debris
Gloves Hand protection
Ladder Stabilizers Prevents ladder movement

Having these items on hand ensures that you’re well-prepared for potential hazards during your work.

Emergency Preparedness

Despite best efforts, accidents can still happen.

  • Keep a first-aid kit nearby while working on the roof.
  • Know emergency contact numbers and have a phone within reach in case urgent assistance is required.
  • Familiarize yourself with basic first-aid procedures like treating minor cuts or addressing sprains caused by falls.

By following these roofing safety tips and taking preventative measures seriously, you can significantly reduce risks during any project while ensuring both efficiency and well-being throughout the process.

Essential Roofing Safety Tips for Minneapolis MN Roof Replacement

Roofing is inherently hazardous, with risks ranging from falls and tool-related injuries to exposure to harsh weather conditions. Whether you’re a professional roofer or a homeowner tackling a DIY roofing project, prioritizing safety is essential. Below are comprehensive roofing safety tips to help ensure a safe work environment.

Essential Safety Tips for Minneapolis MN Roof Repair

Wearing the right protective gear can significantly minimize risks.
Harness System:A full-body harness with secure anchor points prevents falls from heights.
Non-Slip Footwear:Roofing surfaces can be slippery, especially in wet or icy conditions. Invest in high-quality, non-slip shoes or boots designed for roof work.
Hard Hats:Protect your head from falling objects like tools or debris.
Gloves:Ensure proper grip and protect hands from abrasions or cuts while handling shingles and other materials.
Eye Protection:Use safety glasses to shield your eyes from dust, nails, and flying debris when cutting or nailing shingles.

Ensuring Ladder Safety for Minneapolis MN Roof Installation

Improper ladder use is one of the most common causes of roofing accidents.
1. Inspect ladders for any damage before use, ensuring they can support your weight and the weight of tools/materials you carry.
2. Position the ladder on flat, stable ground at the correct angle (a 4:1 ratio – for every four feet of height, place the base one foot away from the wall).
3. Secure the ladder at both the top and bottom to prevent movement during use.

Be Mindful of Weather Conditions

Weather plays a crucial role in determining roof safety:
– Avoid working on roofs during rain, strong wind, or snow as wet shingles can be slippery and high winds may affect stability. – In hot climates, schedule roofing jobs during cooler parts of the day to avoid heat-related illnesses such as dehydration or heatstroke. – Check for lightning risks if there are storm forecasts.

Maintain Cleanliness and Organization on Site

A clutter-free workspace reduces tripping hazards and allows you to focus more effectively on your work:
– Keep tools organized in tool belts or boxes placed securely on flat surfaces. – Remove any loose debris such as old shingles immediately after detaching them. – Use tarps to collect fallen nails, ensuring none cause injury later.

Conduct Regular Equipment Inspections

Faulty equipment is a recipe for disaster when roofing at heights: – Inspect power tools like nail guns for defects before operation. – Examine ropes, harnesses, carabiners, lanyards, and other fall protection components regularly for wear and tear. – Replace worn-out equipment immediately rather than waiting until it fails.

Work in Teams When Possible

Having additional people around provides support that can improve efficiency while also enhancing safety: – Spotters can monitor ladder stability while others climb. – Team members can provide immediate assistance if an accident occurs.

Task One-Person Risk Level Safer With Two+ People
Carrying heavy loads up ladders High risk Lower risk
Installing awkwardly shaped materials Medium risk Greatly reduced
Emergency response Very high risk Safer with assistance

Take Breaks Often Enough

Roofing requires physical exertion; fatigue increases accident likelihood:
– Take short breaks every couple of hours depending upon workload intensity. Hydrate frequently during especially warm seasons too.

Sticking closely above principles ensures safer workflows across projects regardless whether scaled commercial ventures smaller DIY renovations underway alike

Planning for Shingle Installation: What Every Roofer Should Know

Proper planning is critical when preparing for a shingle installation project. Whether you’re a professional roofer or a homeowner tackling the task, taking time to organize and strategize can save you both time and money while ensuring the project is completed efficiently. Below, we outline key considerations and steps to help you plan effectively.

Assessing the Roof’s Condition

Before beginning any shingle installation, it’s essential to evaluate the current state of your roof.

  • Structural Damage: Look for sagging areas, signs of rot, or compromised decking.
  • Leaks or Moisture Issues: Inspect for water damage in the attic or stains on ceilings that may indicate leaks.
  • Existing Shingles: Determine whether old shingles need to be removed or if they’re compatible with an overlay.

An inspection ensures you’re addressing any underlying issues before applying new shingles, which can extend the lifespan of your roof.

Calculating the Scope of Work

Carefully planning out the scope of work helps streamline your approach.

  1. Roof Dimensions
    Measure the length and width of each section of your roof to calculate its square footage. This will help you determine how many shingles are required.
  2. Pitch and Slope
    Steeper roofs pose additional challenges and may require safety precautions such as harnesses or guardrails.
  3. Weather Conditions
    Schedule your project during optimal weather conditions—avoid days with high winds, heavy rain, or extreme temperatures that might hinder progress.

Permits and Regulations

Depending on where you live, local building codes may require permits before roof work begins.

  • Roofing materials
  • Installation techniques
  • Waste disposal requirements

Failing to comply with local building codes can result in fines or mandatory changes later in the process.

Tools and Materials Checklist

Having all necessary tools and materials ready before starting ensures efficiency during installation.

Tools Materials
Roofing nailer Asphalt shingles
Utility knife Felt underlayment
Ladder Ice and water shield
Chalk line Roofing nails
Tape measure Ridge cap shingles
Safety harness & helmet Drip edge flashing

Ensuring these items are readily available will reduce unnecessary delays caused by mid-job trips to purchase supplies.

Creating a Timeline

Developing a timeline helps keep your project organized from start to finish.

  1. Preparing the roof deck (removing old shingles if necessary)
  2. Installing underlayment and flashing
  3. Laying down starter strips
  4. Securing rows of shingles from bottom to top
  5. Applying ridge caps and performing cleanup

By dividing tasks into clear steps, you’ll have better control over progress while minimizing disruptions.

Budgeting Considerations

Planning also involves outlining a budget for labor costs (if hiring professionals), materials, tools, and unexpected expenses such as replacing damaged decking. Allocate funds appropriately so unexpected issues don’t derail your project partway through completion.

Proper preparation sets the foundation for a successful shingle installation process while reducing costly errors along the way. Taking these planning steps allows you to ensure durability, efficiency, and a long-lasting finished product when working on roofing projects large or small alike.

Roofer Builder Worker Ensuring Roof Maintenance Roofer Construction Worker Replace Tile Of The Old Roof roofer contractor stock pictures, royalty-free photos & images

Simplified Shingle Estimation with a Trusted Minneapolis MN Roofing Contractor

Accurately estimating the number of shingles needed for your roofing project is a critical step in ensuring a smooth and cost-effective installation. Overestimating can lead to wasted materials and increased costs, while underestimating may cause delays due to inadequate supplies. This guide will help you calculate the right amount of shingles for your project using straightforward methods.

Steps to Estimate Shingle Quantities

  1. Begin by measuring the length and width of each roof section in feet.
  2. Multiply these numbers to calculate the square footage of each section. For example, a section that is 20 feet long and 15 feet wide equals 300 square feet (20 x 15 = 300).
  3. Add up the square footage of all roof sections to determine your total roof area.
  4. Roof pitch affects how much material you’ll need, as steeper roofs require more shingles due to their angled surface area.
    | Roof Pitch | Multiplier | |——————–|————| | Low slope (3:12) | 1. 03 | | Moderate slope (6:12) | 1. 12 | | Steep slope (9:12) | 1.
    Multiply your total square footage by the appropriate factor above for an accurate estimate.
  5. Roofing materials are typically sold in “squares,” where one square equals 100 square feet of roofing material coverage. Divide your total adjusted square footage by 100 to determine how many squares you’ll need.
  6. To account for waste due to cutting, trimming, or mistakes, add an additional percentage:
    • Standard roofs: Add 10%
    • Complex roofs with valleys or dormers: Add 15-20%

Example Calculation

Let’s consider an example: – Total roof dimensions = 2,000 sq ft – Roof pitch = Moderate slope (6:12), multiplier = 1. 12 – Adjusted area = 2,000 x 1.

Final estimate: Approximately 24 squaresof shingles.

Additional Tips for Accurate Estimation

  • Inspect Before You Start:Examine your roof layout carefully and identify any features like chimneys or skylights that may affect shingle placement.
  • Double-check Measurements:Errors in measurement can significantly impact material needs.
  • Consult with Suppliers:Many roofing supply stores offer free tools or advice on calculating quantities based on your specific project.

By following these steps and tips, you’ll have a reliable estimate that minimizes material waste and ensures an efficient installation process.

DIY Roof Shingles vs. Professional

When it comes to installing or replacing roof shingles, the decision between doing it yourself and hiring a professional roofer is a pivotal one. Both options come with their own set of advantages and challenges. Understanding these factors can help you make the best choice for your roofing project.

Advantages of DIY Roof Shingle Installation

  • Cost Savings: One of the main reasons homeowners opt for DIY is the potential to save money. By eliminating labor costs, you can significantly reduce overall project expenses.
  • Learning Opportunity: Installing shingles yourself provides hands-on experience and knowledge about roofing systems.
  • Flexibility: You have complete control over scheduling, materials, and methods used during installation.
  • Satisfaction: For many, successfully completing a roofing project provides a strong sense of pride and accomplishment.

Challenges of DIY Roof Shingle Installation

  • Skill Requirement: Roofing requires precision and expertise that may be difficult for beginners to achieve. Mistakes can lead to costly repairs later.
  • Safety Risks: Working on a roof involves significant hazards, including falls or injuries due to improper handling of tools.
  • Time Consumption: Without experience, even small roofing projects can take much longer than anticipated.
  • Warranty or Insurance Issues: Many manufacturers’ warranties require professional installation to remain valid. Additionally, improper installation might not be covered by insurance in case of future damage.

Benefits of Hiring Professional Roofers

Professional roofers bring experience and expertise that ensures high-quality results.

  • Expertise and Precision: Trained professionals have the skills necessary for efficient and precise installations.
  • Time Efficiency: Professionals complete projects faster due to their knowledge and access to specialized tools.
  • Safety Measures: Roofing contractors are trained in proper safety protocols and come equipped with protective gear.
  • Warranties Included: Most professional services include workmanship warranties in addition to manufacturer guarantees on materials.
Comparison Factor DIY Installation Professional Installation
Cost Lower (labor savings) Higher (includes labor)
Time Required Longer (especially for beginners) Shorter
Expertise Needed High (for quality results) Low (handled by professionals)
Safety Risks Significant Minimal
Warranty Validity Sometimes void Often reinforced

Considerations Before Deciding

  1. Project Complexity:A simple repair may be manageable as a DIY project, but larger installations are often best left to experts.
  2. Tools & Equipment:Do you have access to ladders, safety harnesses, nail guns, or other essential tools?
  3. Budget:While upfront costs might favor DIY efforts, potential mistakes could lead to higher long-term expenses.
  4. Time Availability:Assess whether you have enough time available for learning processes and completing the project thoroughly.

Both approaches offer value depending on your goals, resources available, and personal expertise level.

Everything You Should Consider Before Starting a Roofing Project

Embarking on a roofing project is a significant undertaking that requires meticulous planning and informed decision-making. Whether you’re replacing an old roof, repairing damage, or installing a new one, there are several factors to take into account to ensure the project goes smoothly and meets your expectations. Below is a comprehensive guide to help you prepare effectively.

Assess Your Roofing Needs

Before diving into your roofing project, it’s crucial to identify what your property requires.

  • Is this a total roof replacement or just minor repairs?
  • Does the roof need additional insulation or ventilation upgrades?
  • Are there any structural issues, such as sagging or rotting in the framework?

A thorough inspection of the roof can help pinpoint areas that need attention and prevent costly surprises later.

Determine Your Budget

Roofing projects can vary significantly in cost depending on factors like materials, labor, and scope of work.

  • Material Costs: Asphalt shingles are more affordable than slate or metal roofing.
  • Labor Fees: Professional installation typically accounts for 60%–70% of the total cost.
  • Additional Costs: Include expenses for permits, removal of old materials, waste disposal, and unforeseen repairs.

To stay on track financially, consider obtaining multiple quotes from reputable contractors before making a final decision.

Material Type Approximate Cost (Per Square Foot)
Asphalt Shingles $1–$5
Metal Roofing $5–$14
Wood Shingles/Shakes $6–$10
Slate $10–$30

Choose Suitable Materials

Selecting the right roofing material involves balancing aesthetics with functionality.

  • Climate Suitability: Opt for materials that perform well under local weather conditions (e. g. , metal roofs for snow-heavy regions).
  • Longevity and Maintenance: Some materials like slate last over 50 years but require higher initial investments.
  • Architectural Style: Ensure your choice complements the design of your home.

For example: – Traditional homes often pair well with wood shakes. – Modern designs may benefit from sleek metal panels.

Check Local Regulations and Permits

Many municipalities have specific rules regarding roofing projects.

  1. Obtain any necessary building permits.
  2. Verify compliance with homeowners’ association guidelines if applicable.
  3. Confirm adherence to local building codes related to fire resistance or wind ratings.

Failing to meet these requirements could result in fines or complications during resale.

Evaluate Professional vs.

DIY Pros:– Potentially lower labor costs. – Full control over every aspect of the project.

DIY Cons:– High risk if inexperienced; errors can lead to leaks or structural damage.

Professional Installation Pros:– Expertise ensures quality results. – Often includes warranties for both workmanship and materials.

Professional Installation Cons:– Higher upfront costs due to labor fees.

Plan for Weather Conditions

  1. Aim for dry seasons when rain and snow are less likely.
  2. Monitor long-term forecasts closely before starting work.
  3. Prepare contingency plans in case sudden weather changes occur mid-project.

Taking these considerations into account will help ensure that your roofing project is completed efficiently, safely, and within budget while meeting your expectations for quality and durability.

handyman using nail gun to install shingle to repair roof handyman using nail gun to install shingle to repair roof roofer contractor stock pictures, royalty-free photos & images

Everything You Should Consider Before Starting a Roofing Project

Starting a roofing project is a significant undertaking that requires careful planning and preparation. Whether you’re a homeowner tackling the job yourself or hiring professional roofers, there are several key factors to keep in mind to ensure the project goes smoothly, stays on budget, and results in a durable roof that meets your needs.

Evaluate Your Roofing Needs

Before starting any roofing work, it’s crucial to assess the condition of your existing roof and determine whether it needs repair or complete replacement.

  • Roof Age:Most roofs last between 20-30 years depending on materials used. If your roof is approaching this age, replacement might be necessary.
  • Visible Damage:Look for cracked shingles, leaks, sagging areas, or signs of rot.
  • Energy Efficiency:Older roofs may lack proper insulation and ventilation, increasing energy costs.

Set a Budget

Roofing projects can vary significantly in cost depending on materials, labor requirements, and additional factors like permits or unforeseen repairs. A clear understanding of your budget will help you make better decisions about materials and installation methods.

  • Material Costs:Asphalt shingles are typically more affordable than metal or slate roofing.
  • Labor Costs:Professional installation often accounts for a significant portion of the budget.
  • Contingency Fund:Unexpected repairs may surface during the project. Allocate 10-15% of your budget for such surprises.
Material Type Average Cost per Square Foot Lifespan
Asphalt Shingles $1 – $5 20 – 30 years
Metal Roofing $5 – $12 40 – 70 years
Slate $10 – $20 50+ years

Choose the Right Contractor (If Not DIY)

If you plan to hire professional roofers for the job, selecting a reliable contractor is essential.

  • Licensing & Insurance:Ensure they have proper licensing and liability insurance coverage.
  • References & Reviews:Check online reviews or ask past clients about their experience.
  • Warranty Offered:Reliable contractors typically provide warranties on both labor and materials.

Select Suitable Materials

The choice of roofing material will impact both aesthetics and functionality.

  1. Consider the climate in your area (e. g. , high winds may require sturdy options like metal).
  2. Match with home design (aesthetic appeal matters).
  3. Balance durability with cost.

Ensure Proper Permits

Many local jurisdictions require permits for roofing projects to comply with building codes. Failure to obtain necessary permits can lead to fines or required rework.

  • Building codes
  • HOA guidelines (if applicable)

Timing Matters

Plan your roofing project during ideal weather conditions to avoid complications caused by rain, snow, or extreme heat.

  • Spring and early summer
  • Late summer through early fall

By carefully considering these factors before beginning your roofing project, you can avoid costly mistakes while ensuring long-term satisfaction with the results. Proper preparation lays the foundation—literally—for success.


Read MoreRead More